When I cut my hair to chin length two years ago, I assumed curling would be easier — less hair, less time, right? Wrong. Everything I knew about curling long hair was suddenly useless. The iron kept burning my neck, the curls either looked like ringlets from a Victorian portrait or fell flat within an hour, and every tutorial I found was on someone with hair past their shoulders. Short hair curling is its own discipline, with its own tools, techniques, and logic. Once I figured that out — and stopped trying to apply long-hair methods to short-hair reality — everything clicked.
Why curling short hair is different (and what to adjust)
Short hair curls differently than long hair for three main reasons, and understanding them saves you from the most common frustrations:
Less weight to pull curls out. Long hair is heavy — gravity naturally elongates and loosens curls over time. Short hair is light, which means curls hold their shape better initially but can also look overly tight or "done" if you're not careful. The trade-off: you don't need to worry about curls falling flat as quickly, but you do need to be more intentional about the size and looseness of the curl you create.
Proximity to the scalp. With less length, the barrel of your iron or wand is closer to your scalp, ears, and neck. Burns are a real risk — especially at the nape and around the ears. This is why technique matters more with short hair: you need precision, controlled movements, and tools designed for close-quarters work.
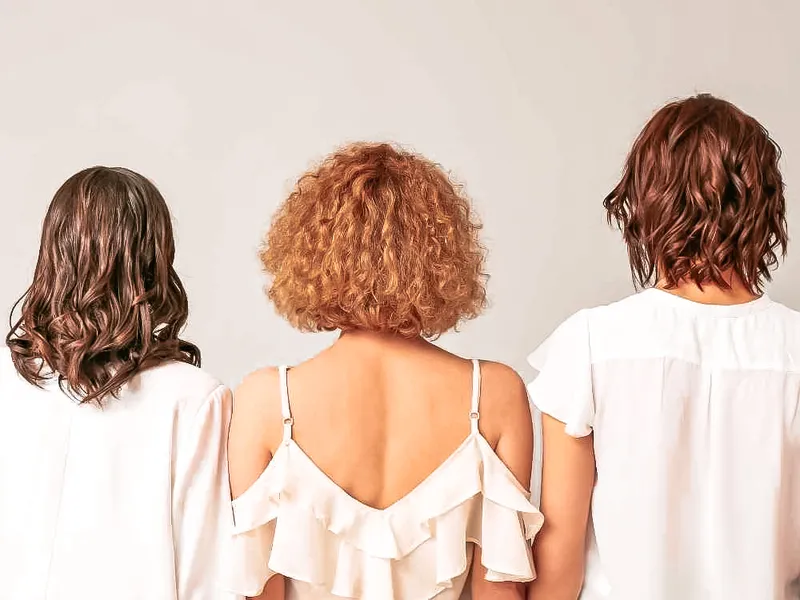
Every section matters more. On long hair, you can miss a section and it blends into the overall look. On a bob, every section is visible and contributes to the silhouette. Inconsistent curl sizes or directions are much more obvious. The upside: short hair requires fewer total sections, so you can afford to be more deliberate with each one.
The right tool size changes. A 32 mm barrel that creates perfect loose waves on long hair creates barely-there bends on short hair. For chin-length hair, you'll want a 19–25 mm barrel. For pixies and very short bobs, a 13–16 mm barrel. The general rule: the shorter the hair, the smaller the barrel — otherwise the hair doesn't wrap around it enough to form a visible curl.
Prep for maximum hold: what to do before picking up any tool
The prep stage is where most people's curls die — not from bad technique, but from inadequate foundation. Short hair curls need grip, texture, and protection before heat ever touches them.
Start with day-old hair. Freshly washed hair is too slippery for curls to hold well — the natural oils and slight texture of second-day hair give curling tools something to grip. If you must curl clean hair, rough it up: apply a texturising spray or dry shampoo throughout (focusing on roots and mid-lengths) and scrunch. You want that slightly "lived-in" feel before you start.
Apply heat protectant. Non-negotiable. Short hair doesn't mean less damage potential — in fact, because you're working closer to the scalp with smaller sections, the heat exposure per strand can be more concentrated. Use a spray (not a cream — creams add weight that can flatten short-hair curls) and apply evenly to all sections. The right heat protection technique makes a difference both for results and hair health.
Add a curl-prep product. This is the step most people skip and then wonder why their curls fall flat after an hour. A lightweight mousse or curl-defining cream gives each strand additional structure — think of it as scaffolding that supports the curl shape after the heat is gone. Apply to damp hair and blow-dry (or let air dry), or apply to dry hair just before curling. Mousse is generally better for fine hair; cream for thicker or coarser textures.
Method 1: Flat iron curls (the most versatile technique)
A flat iron might seem counterintuitive for curling, but it's actually the most versatile tool for short hair — it creates everything from beachy waves to structured S-curls depending on your technique, and its flat profile makes it easier to work close to the scalp without burning yourself.
What you need: a slim flat iron with rounded edges (crucial — sharp-edged plates create crimps, not curls). A 2.5 cm plate width is ideal for most short hair; 1.5 cm for pixie-length. Temperature: 170–185°C for fine or damaged hair, 185–200°C for thick, healthy hair.
The S-wave technique (effortless, modern):
- Take a 2–3 cm section of hair. Clamp the iron near the root (leaving about 2 cm to avoid scalp burns)
- Rotate the iron 180° away from your face while slowly pulling downward
- When you reach the middle of the strand, reverse direction — rotate 180° the opposite way while continuing to pull down
- The result is an alternating S-wave pattern that looks effortless and editorial
- Alternate the starting direction between sections for a more natural, varied result
The classic curl technique:
- Take a thin section (1–2 cm wide). Clamp the iron near the root
- Rotate the iron 360° (a full turn) in one direction while gliding slowly toward the ends
- The hair wraps around the iron's rounded edge, creating a traditional curl
- Release and let the curl cool completely before touching it — at least 15 seconds
- For more defined curls, use thinner sections. For looser waves, use wider ones
Short-hair-specific tip: when you reach the last 2–3 cm of the strand, don't try to curl the very ends tightly — short hair looks more natural with slightly straighter, piece-y ends. Clamping all the way to the tip on short hair creates a ringlet effect that reads "tried too hard" rather than "effortless texture."
Method 2: Curling wand (defined, bouncy curls)
Curling wands (the clampless ones) give you the most control over curl size and shape, because you wrap the hair around the barrel yourself rather than clamping it. This manual control is especially valuable for short hair, where precise placement matters.
What you need: a tapered or straight wand, 19–25 mm barrel. Tapered wands (wider at base, narrower at tip) create more natural-looking curls with variation. Heat-protective glove included with most wands — actually use it, because your fingers will be close to the barrel.
Technique:
- Section your hair. Start at the back (bottom layer), clip everything else up
- Take a 2 cm section. Hold the wand vertically (this is key for short hair — horizontal positioning is for long hair and will create unnatural horizontal ringlets on a bob)
- Wrap the hair around the barrel starting about 2 cm from the root, spiralling toward the tip. Hold for 5–8 seconds
- Release the curl into your palm and hold it there for 3–5 seconds while it cools — this is the secret to lasting curls. The curl sets its shape during cooling; releasing it directly lets gravity pull it apart before it's set
- Alternate curl directions section by section: one toward the face, the next away from the face. This prevents the curls from merging into one uniform wave and creates the textured, multi-dimensional look you see on Instagram
Method 3: Small barrel curling iron (tight, structured curls)
If you want defined, editorial curls with real bounce — think Marilyn Monroe or modern French bob curls — a small barrel curling iron (13–19 mm) is your tool. This method creates tighter curls that you then brush or shake out into the desired level of looseness.
Technique: similar to the wand, but the clamp holds the hair for you. Open the clamp, place the hair midway along the strand, clamp closed, and roll toward the root. Hold for 6–8 seconds. Release, catch the curl in your hand, pin it against your head with a duckbill clip, and move to the next section. Once all sections are curled and pinned, wait 10 minutes for everything to cool completely. Then remove the clips and shake your head gently — the curls will loosen into voluminous, bouncy waves.
The pin-curl cooling method (clipping each curl against the head while it cools) is the single most effective technique for long-lasting curls on short hair. It takes an extra 10 minutes but can make the difference between curls that last 3 hours and curls that last all day. Professional stylists use this technique routinely — it's not extra effort for nothing.
Method 4: Velcro rollers (volume and soft waves)
Velcro rollers are an underrated option for short hair — they're gentler than heat tools, create gorgeous volume at the crown, and produce soft, uniform waves rather than defined curls. They're also incredibly easy to use, which makes them perfect for mornings when you want texture without committing to a 30-minute curling session.
What you need: medium-sized Velcro rollers (32–40 mm for bob length, 25–32 mm for shorter). You'll need 8–12 rollers for a typical bob.
Technique:
- Start with slightly damp hair (80% dry) or dry hair sprayed with water and setting spray
- Take a section roughly the width of the roller. Place the roller at the ends and roll upward toward the scalp — the Velcro grips the hair without clips
- For volume: roll the front and crown sections upward and back. For waves: roll alternating directions (some forward, some backward)
- Leave rollers in for 20–30 minutes while you do your makeup, have breakfast, or commute (they're lightweight enough to wear around the house). For faster results, hit each roller with a blast of warm air from a blow-dryer for 10–15 seconds, then let cool completely before removing
- Remove rollers gently (unroll, don't pull), shake your head, and finger-style into place
The result: lift and body at the roots with soft, swooping waves through the lengths. It's the closest thing to a professional blowout you can achieve at home without any technical skill.
Methods 5–7: Heatless curling (overnight and no-damage options)
If you're trying to minimise heat damage — especially if your hair is already dry or damaged — heatless methods are worth exploring. They take longer but cause zero thermal damage.
Method 5 — Headband curls. Wrap slightly damp hair around a soft headband (the stretchy fabric kind, worn across your forehead). Take small sections, wrap each one around the headband away from your face, tucking the ends under. Sleep on it (a silk pillowcase helps prevent frizz). In the morning, carefully unravel and separate with fingers. The result: soft, romantic waves with excellent root volume. This works surprisingly well on bobs and even chin-length hair.
Method 6 — Braids. The simplest method. On damp hair, create 4–6 small braids (the more braids, the tighter the wave). Secure ends with small elastics. Sleep overnight or leave for at least 4 hours. Unravel, separate with fingers, apply a light oil to reduce frizz. The challenge with short hair: the braids may be very short and not hold well at the ends. Using small elastics or bobby pins at the tips helps. French braids starting at the crown work better than loose braids for short hair because they incorporate the shorter layers.
Method 7 — Pin curls. The vintage technique that's genuinely effective. On damp or product-laden hair, take a small section, wrap it around your finger to form a flat coil against your head, and pin with a bobby pin or duckbill clip. Repeat all over. Sleep with a silk scarf or bonnet to keep everything in place. In the morning, remove pins, shake out, and style. Pin curls create the most defined, vintage-looking curls of any heatless method — and they work on very short hair (even pixie cuts) where other methods can't.
Making curls last: the finishing routine
Creating the curl is half the battle. Making it survive the day is the other half.
Let curls cool before touching. This cannot be overstated. Freshly curled hair is in a malleable state — the hydrogen bonds haven't fully reset. Touching, brushing, or tousling too soon pulls the curl apart before it's locked in. Wait a full 5 minutes after your last curl before doing anything to your hair.
Use a texturising spray. After cooling, spritz a texturising or sea salt spray lightly through the curls. This adds grit and separation — the grip that prevents curls from relaxing into straight hair. Don't oversaturate; a few pumps from 30 cm away is sufficient.
Finish with a flexible-hold hairspray. Not the helmet-head kind — a light to medium hold spray that allows movement while maintaining shape. Apply from 30–40 cm away, moving the can as you spray to avoid creating wet spots. Two passes over the entire head is usually enough.
Break up the curls with intention. Once cooled and sprayed, gently separate the curls by running your fingers through from underneath (not from the top, which creates frizz). For a more undone look, flip your head upside down and shake once, then flip back up. The goal is separation and movement, not dissolution.
Throughout the day: don't touch your hair. Seriously. Every time you run your fingers through, you're transferring oils and pulling the curl apart. If a section drops, re-curl just that section with your iron or wand rather than trying to scrunch it back to life (which rarely works). And at the end of the day? Pineapple it (gather loosely at the crown with a silk scrunchie) for overnight preservation — you might get a second day out of your curls with minimal touch-up.
Frequently asked questions
What barrel size is best for a bob?
For a chin-length bob, 19–25 mm creates the most versatile curls — tight enough to be visible, loose enough to look modern. For a longer lob (shoulder-length), you can go up to 28–32 mm for beachy waves. For a very short bob or grown-out pixie, 13–16 mm is necessary to get enough wraps around the barrel to form an actual curl. The rule: your hair should wrap around the barrel at least 1.5 times to create a lasting curl.
Why do my short hair curls fall flat so quickly?
Three likely causes: insufficient prep (no texturising product before curling), touching the curls before they've cooled completely, or using too large a barrel for your hair length. Fine hair also drops curls faster — if your hair is fine, use slightly tighter curls than you want in the final result, because they'll loosen naturally. The pin-curl cooling method (pinning each curl to cool against your head) makes the biggest difference for holding power.
Can I curl a pixie cut?
Yes, if the top is at least 5–7 cm long. Use a 13 mm wand or a mini flat iron with rounded edges. The technique shifts to creating texture and direction rather than traditional curls — think piece-y movement, not ringlets. Pin curls (the vintage method) are also excellent for pixie-length hair and create defined, retro-looking waves that hold well all day.
Should I curl toward or away from my face?
Both — and alternating is the key to natural-looking results. Curling every section away from the face creates a uniform, "done" look. Alternating directions (one section toward, the next away) creates dimension and movement that looks more effortless. The front face-framing pieces are an exception: most people find these look best curled away from the face, opening up the features.
How do I prevent burns when curling short hair?
Use a heat-protective glove (included with most wands). Place a folded damp cloth between the barrel and your skin at the nape. Work in a well-lit area with a mirror that shows the back of your head. Use a flat iron for the trickiest sections near the ears and neck — its flat profile sits further from skin than a round barrel. And take your time — burns happen when you rush, not when you're careful.
Sources
Keep on bubbling
- How to make your straightening last all day — the opposite technique, perfected
- How to get rid of static hair — tame flyaways that ruin your curls
- How to repair dry, damaged hair — protect against heat damage