
On Saturday 30 July 2022, 3,608 couples got married in England and Wales. In one day. That's the busiest wedding date of the year in the Office for National Statistics bulletin on marriages in 2021 and 2022 — and the pattern isn't a fluke. According to the ONS, the most popular days in recent years tend to be either the first Saturday in September or the last Saturday in July.
Behind those numbers is a scene you know by heart. It's 10.40am — the ceremony's at noon — and the bathroom is already stuffy. Your mid-length hair is refusing everything you ask of it. Too short for the bridal updo you saved on Pinterest (the one with the flowers). Too long to leave down against your neck for a whole afternoon in the sun. The result: a ponytail thrown together in a hurry, sliding loose before the canapés come out.
I know this awkward length well. My hair is fine, bleached and wavy when it feels like it — and since the winter, it's sat just below my shoulders. So I spent the first warm evenings of June testing every bun I know (phone stopwatch running, in my second-floor Hackney flat with no lift and no breeze). Here are the six that hold in under ten minutes, with two hair ties, one claw clip and a handful of pins. For each: the steps, my real time, and how it behaves on fine hair — like mine — or thick hair.
Why buns fall out of mid-length hair (and how to stop it)
A bun holds thanks to two things. Enough length to wrap at least once around its base, and enough grip for the pins not to slide. Mid-length hair — anywhere between your chin and the top of your shoulder blades — is often short on both. The length barely makes one turn. And the shorter layers underneath escape the moment you turn your head.
The second enemy is squeaky-clean hair. Washed that morning, it's smooth and slippery — it pushes pins out like a wipe-clean tablecloth. That's why plenty of hairdressers ask you to turn up with second-day hair for an occasion updo (the bit of natural oil gives them something to work with).
Problem three: layers. A great layered cut worn down turns into a puzzle in a bun, because every short layer has its own length and refuses to follow. The fix isn't to slick everything down with gel. It's to choose buns that welcome loose strands (the messy bun, the claw clip) or trap them — in a twist, in a plait.
Finally, weight. With thick hair the problem flips: there's so much of it that one clip or three pins won't cope, and the bun sags towards your nape within the hour. The fix is one word. Divide. Two sections, two hair ties, two small buns that read as one.
Before you reach for the pins, check your starting texture. If you're not sure whether your hair is fine, thick, porous or not, start with the guide to working out your hair type and the routine that suits it. It changes your choice of bun more than the length does.
The minimal kit for a bun: five accessories, no more
You don't need a stylist's kit. For the six buns below you need five things — all from the hair accessories aisle at Boots, Superdrug or Claire's.
| Accessory | What it does | The detail that matters |
|---|---|---|
| Thin fabric-covered hair ties | Secure the base of a bun or plait | No metal join, in your hair colour |
| Hair pins (U-shaped) | Hold the bulk of the bun | They "stitch" the bun to its base without pinching |
| Kirby grips | Flatten a stray piece, anchor a French pleat | Wavy side against your scalp |
| Medium claw clip | The one-minute bun | Wide enough to close over all your hair |
| Dry shampoo or texturising spray | Gives clean hair some grip | On the lengths, not just the roots |
The difference between a hair pin and a kirby grip is the key to everything. A kirby grip clamps a section between its two prongs — perfect for flattening, useless for carrying weight. A hair pin, the open U-shape, doesn't clamp anything. It hooks into the hair and holds it by friction. That's what carries a bun, especially in thick hair.
As for hair ties, go thin and soft. A big scrunchie looks lovely over a finished bun — but it won't hold a base in mid-length hair. And skip the office rubber bands (yes, some of us still do it in a pinch).
Bun 1: the low twisted bun, in 3 minutes
This is the basic bun — the one you'll do without a mirror after three attempts. It works for the office and for a wedding. And it holds in mid-length hair because the twist makes up for the missing length: as it coils on itself, it gains volume. Kit: one hair tie (optional) and four to six hair pins.
- Gather your hair at the nape — as if for a low ponytail. With fine hair, secure it with a hair tie that isn't too tight: the base will be sturdier.
- Twist all the length in one direction — like a rope — until it starts to coil on its own.
- Wrap the twist around its base, in the direction of the twist. With mid-length hair, expect one turn, maybe one and a half.
- Tuck the ends under the bun (they disappear on their own).
- Secure with four pins, sewing-style, at twelve, three, six and nine o'clock.
Got fine hair? The bun will look small. Gently loosen the twist with your fingertips before pinning — it gains a good third in volume. With a lot of thick hair, skip the hair tie and make two twists side by side (one per half of your hair), each coiled on itself, then pinned against each other. Nobody — honestly, nobody — will notice there are two.
My real time: 2 minutes 50 with the hair tie, 3 minutes 30 without. It survived a full office day and then drinks in a pub garden — with two pins to push back in around 7pm.
Bun 2: the claw clip twist, in 1 minute
The claw clip came back into our bags a few summers ago — after a long exile at the bottom of the drawer. For mid-length hair, it's the accessory that saves the most time. It doesn't grip the roots, it lifts the hair off your neck, and you can do it walking to the Overground. Kit: one medium claw clip. That's it.
- Gather your hair as if for a low ponytail — no hair tie.
- Twist the length half a turn upwards (no more).
- Fold the twist up against the back of your head, ends pointing up. With mid-length hair, the ends fan out over the top (that's the look).
- Open the clip and close it from top to bottom — teeth biting into both the twist and the hair on your head.
It all comes down to that last move. If the clip only bites the twist, the bun hangs and slides. If it catches the hair at the base too, it won't budge. With fine hair, choose a smaller clip than you think — a clip that's too big closes on thin air. With thick hair, a large clip with a double row of teeth, placed horizontally.
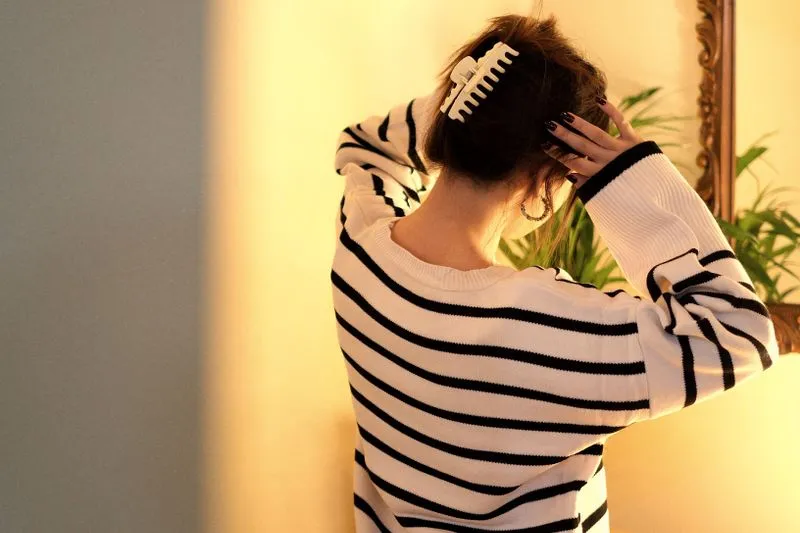
45 seconds, timed (promise). It's my heatwave bun — home, market, working from home. For an evening out I keep it for casual outfits (a claw clip, however pretty, is still a daytime accessory).
Bun 3: the high messy bun, in 4 minutes
The messy bun has an unfair reputation (the bun that supposedly does itself). People think you just grab everything on top of your head and hope. With long hair, maybe. With mid-length hair, you need a trick — the length won't wrap around a high ponytail. The trick is the loop. Kit: one hair tie, three or four pins.
- Tip your head forward and gather your hair at the crown. Don't smooth it: the texture is part of the look.
- Wrap the hair tie round once, then twice (three times on very fine hair).
- On the last pass, don't pull the hair all the way through. Leave it as a loop, ends caught in the tie.
- Wrap the ends that stick out around the base of the loop — then pin them with two pins.
- Hold the base with one hand and, with the other, gently tease the loop out in small sections to widen it.
On fine hair, that last step changes everything: a teased-out loop looks twice as thick. To widen it without wrecking it, pinch the hair between thumb and forefinger, right next to the centre, and pull outwards in little tugs: it's the unevenness that makes it look effortless. Spritz some texturising spray first — not hairspray, which sets the strands stiff. On thick hair, one loop rarely holds all of it. Make two (one left, one right of the crown), then pin them together.
Stopwatch: 3 minutes 40 (a good minute of that is teasing). It's perfect for getting your neck free without looking done, and it forgives everything. One catch, though: it's also the bun we tend to scrape up really tight so it stays put. Keep the tie firm, not painful: a bun scraped back every day ends up straining the roots.
Bun 4: the topsy tail bun, in 5 minutes
This is my favourite for mid-length hair — by a mile. And it's the one that impresses most for the least effort. The idea: you flip a low ponytail through itself, then tuck the length into the pocket you've just made. No wrapping needed — so no length needed. Kit: one hair tie and three pins.
- Make a low, soft ponytail at the nape (soft, properly soft: no tension).
- Slide the hair tie down a couple of centimetres to loosen the base.
- Open a gap in the hair just above the tie — two fingers will do.
- Pass the ponytail through the gap, from top to bottom. The sides roll into two little twists.
- Roll the length upwards — like a Swiss roll — and tuck it into the pocket above the hair tie.
- Secure with three pins, sewing-style: one in the centre, one on each side.
If your hair is fine, flip the ponytail through twice rather than once. The twists will be more defined, the bun fuller. When there's a lot of it, the roll gets bulky: split the length in two before rolling, and tuck each half into the pocket separately.
My real time: 4 minutes 20 — a minute of which was spent finding the pocket above the tie. It lasts a whole day without touching up and goes from jeans to a wedding-guest dress. If you only learn one for this summer's weddings, make it this one.
Bun 5: the two-plait bun, in 8 minutes
Plaits have one huge advantage with mid-length hair: they trap the short layers that escape from every other bun. And with two plaits crossed at the nape instead of one, each only has to make half a turn. Kit: two small hair ties, five or six pins.
- Split your hair into two halves, centre parting down to the nape.
- Plait each half in a classic three-strand plait (the basic one, nothing fancy), right to the ends. Secure with a small hair tie.
- Gently pull at the edges of each section to flatten and widen both plaits.
- Cross them at the nape. The left plait goes right, the right plait goes left.
- Pin each plait along its path — ends hidden under the opposite plait.
On fine hair, pulling the plaits wider (step 3) doubles the visible volume. On thick hair, each plait will be long enough to go almost all the way round — coil them one above the other instead of crossing them, and you'll get a higher, more sculpted bun.
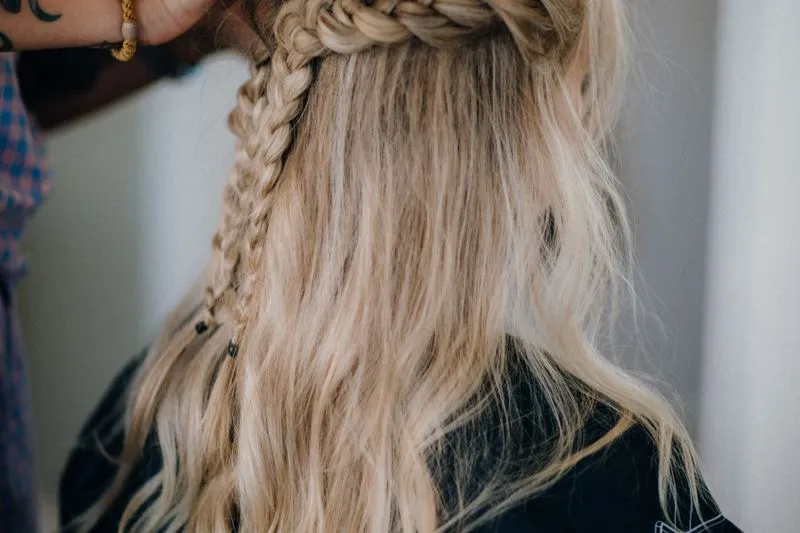
It took me 7 minutes 50 (the left plait is done blind, and my left hand is less gifted). It's the longest of the six. It's also the one that survives the dance floor best. Can't plait behind your head? Bring both sections forward over your shoulders, plait facing the mirror, then cross.
Bun 6: the French pleat, in 7 minutes
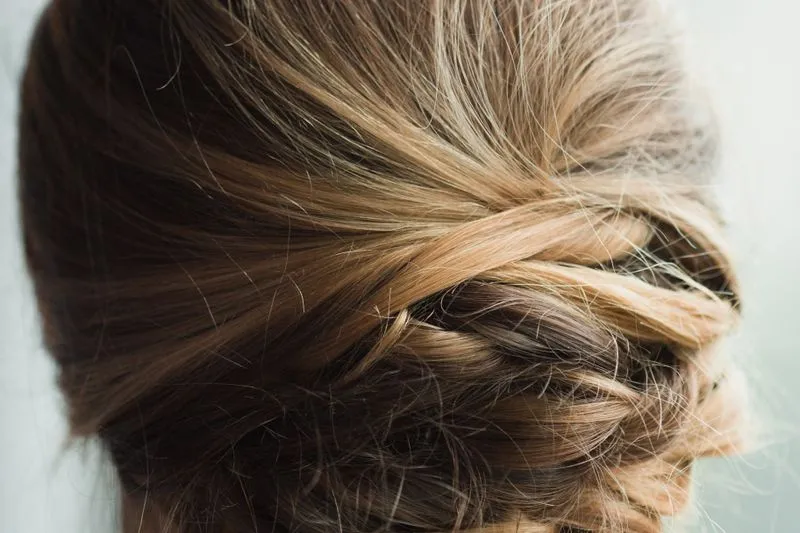
The French pleat (what the rest of the world calls a French twist) is the dressiest of the six. A vertical roll at the back of your head, smooth on one side, hiding all the length. It looks like a salon job — and you can do it yourself as soon as your hair touches your shoulders. Kit: six kirby grips and four or five hair pins.
- Brush all your hair to one side (say, the left) and hold it in one hand.
- Down the centre of the back of your head, place a vertical row of kirby grips crossed in an X, from the nape upwards. That's your anchor: the pleat will rest on it.
- Gather the length and twist it to the right as you lift — to form a vertical roll that covers the row of grips.
- Tuck the ends inside the roll (with your fingertips, or the handle of a tail comb).
- Secure the pleat with hair pins along the seam, from bottom to top.
The row of crossed grips is the whole secret. Without it, the pleat slides. I cross my pins the same way to hold a silk scarf in place, and the principle is identical. On fine hair, backcombing the roots for body is tempting — reach for texturising spray instead (backcombing roughs up the hair with every pass of the comb). On thick hair, make two parallel rows of anchor grips and add more pins.
Does your hair stop above your shoulders? The ends will poke out of the top of the roll. Don't panic: close the pleat with a vertical claw clip instead of pins. Less black-tie, but very chic for an evening.
Third attempt: 6 minutes 45. The first one took a quarter of an hour — and ended up as a ponytail.
Fine or thick hair: which bun holds best?
For fine hair, the buns that trap the hair — the topsy tail and the two plaits — hold best; with thick hair, most of them hold as long as you split the bulk in two. The texture of your hair matters more than its length — I didn't expect that. Fine hair lacks grip and volume. Thick hair, on the other hand, is heavy — and wears the pins out. Here's my scorecard after a dozen evenings of trial and error, so you can choose in thirty seconds.
| Bun | Time | Kit | Fine hair | Thick hair | Best for |
|---|---|---|---|---|---|
| Low twisted | 3 min | 1 hair tie, 4-6 pins | Very good with a tie | As two twists | Office, dinner |
| Claw clip twist | 1 min | 1 clip | Small clip, well planted | Large double-row clip | Home, heatwave |
| High messy bun | 4 min | 1 hair tie, 3-4 pins | Very good, loop teased out | As two loops | Weekend, festival |
| Topsy tail | 5 min | 1 hair tie, 3 pins | Excellent, flip twice | Roll in two halves | Wedding, work |
| Two plaits | 8 min | 2 hair ties, 5-6 pins | Excellent, plaits widened | Plaits coiled | Wedding, dancing |
| French pleat | 7 min | 6 grips, 4-5 pins | Good, with texturiser | Double anchor | Ceremony, evening |
This scorecard comes from my hair and that of two friends who kindly played guinea pig (one with thick, straight hair, the other with dense waves). It's not a study — it's hands-on experience.
Fine hair has another, sneakier problem: the static flyaways that stand up around a bun the moment the air gets dry. If that's you, the tricks for getting rid of static hair work on buns too. A pea-sized dab of leave-in cream, rubbed between your palms and smoothed over the sides, is often enough.
Summer updos: surviving the heat, a full wedding day and a fascinator
A summer bun has two jobs: get your neck free and last the whole day. And wedding season is in full swing. The ONS counted 246,897 marriages in England and Wales in 2022, a return to pre-pandemic levels — which means a lot of Saturdays in front of a bathroom mirror.
In the heat, height matters. A low bun sits on your nape — and keeps it warm. A high bun (the messy bun, a claw clip placed high) frees it completely. For an outdoor ceremony in July, I go for the topsy tail or the two plaits, placed slightly higher than usual — level with my ears rather than on my neck.
A wedding day is long (very long): ceremony, photos, drinks reception, dinner, dancing. A bun that lasts twelve hours isn't a tighter bun. It's a better-pinned bun, with touch-ups planned. And the curling tongs? Keep them for the two or three strands around your face, because heat from styling tools weakens the hair (especially bleached hair like mine).
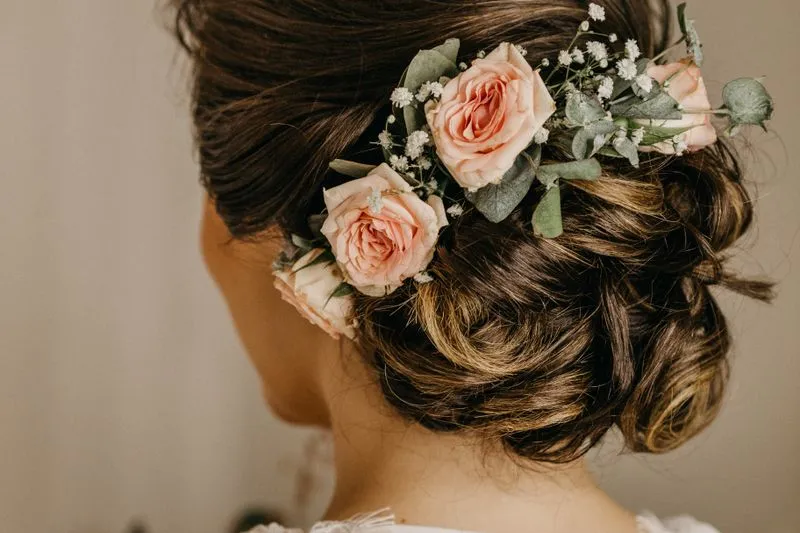
Then there's the very British question: the fascinator. Most come on a comb, a clip or a thin headband, and they need something solid to bite into. Place yours on the side and slightly forward, and pin its comb or clip into the bun itself, never into loose hair alone — it's the bun that should carry the weight. A low topsy tail or a French pleat balances a side fascinator beautifully. A high messy bun fights with it.
Planning a blow-dry or straightening for the occasion? The humidity of a British summer always wins in the end — the techniques for keeping straightened hair smooth all day apply to the sleek strands framing a bun too.
Can a tight bun damage your hair?
Yes — when it pulls, and when it's every day. And this is where the most elegant bun in the world, the ballerina's, becomes a textbook case. The American Academy of Dermatology writes that "Ballet dancers, military personnel, and anyone required to pull their hair back for work are also at a higher risk of getting traction alopecia." Its list of culprits names "Buns, ponytails, and up-dos that are tightly pulled".
Traction alopecia is hair loss caused by repeated tension on the roots. The NHS hair care advice from Gloucestershire is blunt about it: avoid wearing your hair tightly pulled back in a bun or ponytail, because "In time, anything that pulls on your hair can cause permanent hair loss." And according to the AAD, your hairline is one of the first places it shows. Makes sense: that's where the tension peaks when you drag everything back.
A patient leaflet from St George's University Hospitals NHS Foundation Trust, written about Afro-textured hair, includes a risk table (drawn from Haskin and Aguh, 2016) that's useful for everyone: "Hair tied back loosely" sits in the low-risk row, "Hair frequently tied back tightly" in the high-risk one. The difference between the two isn't the bun. It's the tension and the frequency.
The real summer trap is the slicked-back bun — gelled flat, scraped back — that's been everywhere for a few seasons. Once for a wedding (or a night out), no problem. Every day for three hot months, in the same spot, with the same tight hair tie? That's exactly the scenario dermatologists describe. The AAD says it simply: every once in a while, it's okay to wear your hair tightly pulled back, but you want to avoid doing so often.
Why worry about it at 25 (when you still have a full head of hair)? Because this kind of hair loss doesn't always forgive. According to the AAD, when the pulling continues, hair eventually stops growing where it was pulled — and at that stage, it cannot grow back. The good news: prevention is simple, and all six buns in this article lend themselves to it.
- Switch your style regularly. Alternate high bun, low bun, claw clip and hair down: the tension never lands in the same place.
- Know firm from tight. A firm bun doesn't move when you shake your head. A tight bun is still making itself felt an hour later.
- Choose pins over hair ties. A pin holds by friction; a hair tie squeezes the root.
- Give your temples a break. Two soft strands in front of your ears — pretty, and less tension on your hairline.
- Skip the backcombing. It gives volume, but it roughs up the hair with every pass of the comb. Texturising spray does the same job without the breakage.
If your hair already snaps easily, the bun is often just one symptom (bleaching, heat, sun, friction). Start with the realistic guide to repairing dry, damaged hair, then come back to the gentlest buns on the list: the claw clip and the topsy tail.
My verdict after this June: keep two buns up your sleeve, one for daytime and one for occasions. For me, that's the claw clip and the topsy tail. Do each one three times this week, in front of the mirror, with nowhere to be. The fourth time, you'll do it without thinking — on the day you need to be ready by noon.
Frequently asked questions
Which bun works for shoulder-length hair?
The topsy tail bun and the two-plait bun, because neither needs to wrap the full length. The topsy tail tucks the ends into a pocket above the hair tie; the two plaits each make only half a turn. For daytime, a claw clip works as soon as your hair is past your chin.
How do I make a bun stay in fine, straight hair?
Give it grip before you start: dry shampoo or texturising spray through the lengths, or second-day hair. Then choose a bun that traps the hair (plaits, topsy tail) rather than one that relies on wrapping. And pin sewing-style, so each pin catches both the bun and the base.
What's the difference between a kirby grip and a hair pin?
A kirby grip is the flat, closed clip with one wavy side: it clamps a section and is best for flattening strands or anchoring a French pleat. A hair pin is the open U-shape: it holds by friction and carries the weight of a bun. Most buns need both.
Can I sleep in a bun?
Better not to sleep in a tight bun or with pins in, which pull and rub all night. To keep some wave, a loose plait or a very soft bun tied with a fabric scrunchie is kinder to your hair.
Is a claw clip gentler on hair than a hair tie?
A well-chosen claw clip doesn't squeeze the roots: it holds the twist against your head. So it generally pulls less than a ponytail cinched tight with a hair tie. The rule stays the same whatever the accessory: if the style hurts, it's too tight.
Should I put my hair up wet so the bun holds better?
No. Wet hair is more fragile, and the centre of the bun dries badly. Dry your hair first, then style it. For a wet look, apply gel to dry hair and keep the style soft.
Wedding hair: DIY or book a hairdresser?
As a guest, any of the six buns in this article is plenty, as long as you've practised it two or three times before the day. If you're a bridesmaid and the day starts at dawn, a salon booking takes the pressure off. Either way, keep the rescue kit in your clutch.
Sources
- Office for National Statistics — Marriages in England and Wales: 2021 and 2022 (2024)
- Gloucestershire Hospitals NHS Foundation Trust — Good hair care advice (2024)
- St George's University Hospitals NHS Foundation Trust — Afro-textured hair (patient leaflet, 2024)
- American Academy of Dermatology — Hairstyles that pull can lead to hair loss (2024)
- American Academy of Dermatology — 10 hair care habits that can damage your hair