I spent an embarrassing amount of money on a textured ceramic vase last year. Eighty-nine dollars for something that sits on my bookshelf and holds a single dried pampas grass stem. Then my friend showed me how she made one — identical, genuinely identical — from a thrift store glass vase and some wall filler compound. Total cost: about seven dollars. I stared at it for a full minute before asking her to teach me.
That was my entry point into DIY home decor, and I haven't stopped since. Not because I'm suddenly handy (I am absolutely not), but because the gap between what stores charge for trendy decor and what it actually costs to make is absurd. A terrazzo tray? Twelve dollars in materials, sold for ninety. Handmade candles? Three dollars each to pour, forty-five to buy. The math is insulting once you see it.
So here are 15 DIY decor projects I've either made myself, watched friends nail, or have enough confidence in to recommend without caveats. These aren't the kind of crafts that look "homemade" in the pejorative sense. They look like deliberate design choices — because they are.
Why DIY decor has gone mainstream
Ten years ago, making your own decor was niche. Blog-niche, even — somewhere between scrapbooking and decoupage in the hobby hierarchy. In 2025, it's a full-blown cultural shift. Pinterest's annual Predicts report showed a 40% year-over-year increase in "DIY home decor" searches. TikTok's #DIYDecor hashtag has north of 12 billion views. This isn't a trend. It's a correction.
Three forces are driving it. First, the price of new furniture has become genuinely difficult to justify. A decent sofa starts at $1,500. A coffee table with any design sensibility, easily $400. When your decor budget is whatever's left after rent and groceries, you learn to repurpose, recover, and reinvent. Second, there's an environmental reckoning happening — the EPA estimates Americans generate over 12 million tons of furniture waste annually, most of which ends up in landfills. DIY is a way of saying "this piece still has life in it."
And then there's the third force, the one people talk about less: the desire to live in a space that doesn't look like page 47 of the IKEA catalog. No shade — I own a Kallax shelf, like everyone. But there's a particular satisfaction in having someone over and being able to say "that? I made it." Not out of vanity. Because it tells a story.
Walls & surfaces: 4 ideas to transform your space
Walls represent roughly 80% of a room's visible surface. And yet, in most homes, they're either bare or decorated with a mass-produced canvas bought on sale from a big-box retailer. No judgment (I've been there). But the alternatives are so much more interesting — and surprisingly achievable.
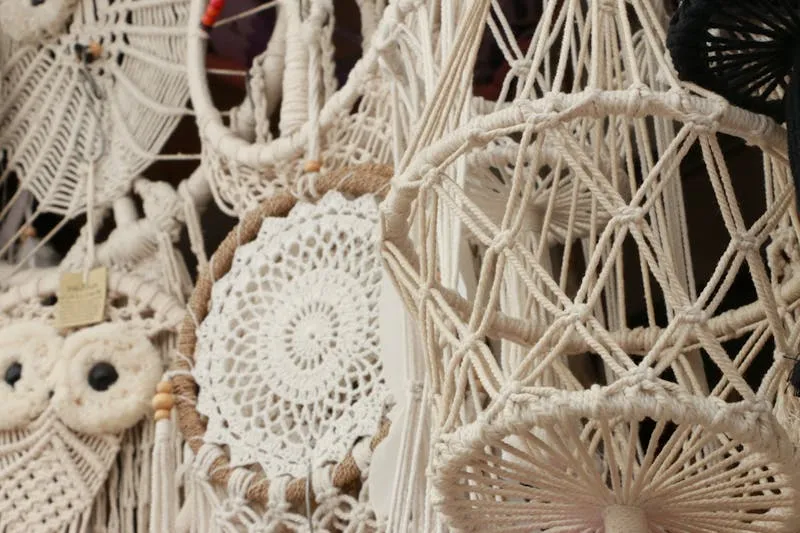
1. Macramé wall hanging — the bohemian staple
Macramé is the perfect starter project. I mean that literally — if you can tie a knot, you can do this. You need three things: cotton cord (3mm or 5mm diameter), a horizontal support (a driftwood branch, a brass rod, an old wooden hanger), and a 20-minute YouTube tutorial. The square knot and the spiral knot are all you need for a first piece.
What separates a mediocre macramé from a stunning one is scale. Go big. A wall hanging that's at least 16 inches wide, hung above the sofa or the headboard, has presence. A small 6-inch piece lost on a large white wall looks like a craft project, not a design choice. Budget: $15-30 for a large piece. Time: one afternoon, coffee breaks included.
2. Preserved moss wall art
This one impresses everyone who sees it. A deep picture frame (salvaged or bought — shadow box frames work beautifully), preserved green moss, a few colored lichens, and a hot glue gun. The result is stunning: it looks like a slice of forest mounted on your wall, with zero maintenance. No watering, no sunlight needed. Preserved moss retains its texture and color for years.
The pitfall: buying cheap moss from a generic marketplace. It's often dyed with colorants that stain your fingers and fade to brown within six months. Invest in quality preserved moss ($20-35 for a bag that'll cover a 12x16 inch frame). Nordmoss and Scandia Moss are reliable brands. The cost per square inch is actually reasonable when you factor in the zero-maintenance lifespan.
3. Stencil mural — for walls with personality
You don't need to know how to draw. Large-format stencils are everywhere — Etsy, Amazon, specialty shops — and the designs range from art deco geometric to tropical foliage. The concept: choose one wall (just one, not the entire room — we're not recreating a Moroccan riad) and create a wallpaper effect without actual wallpaper.
The technique is straightforward but requires method. Painter's tape, acrylic paint applied with a foam roller (not a brush — it bleeds under the stencil), and patience. The secret: very little paint on the roller. Three light coats always beat one thick coat that drips. Result: a unique accent wall that looks like custom wallpaper. Budget: $25-40 for stencil and paint combined.
4. Wood slat accent wall — the architect effect
Wooden slats mounted vertically on a wall — this has been the breakout DIY trend of the past two years, and for good reason. The result looks almost architectural, and the technique is accessible to anyone who can use a tape measure and construction adhesive. Pine or oak battens (1x2 dimensional lumber from any hardware store works perfectly), cut to the same length, evenly spaced, glued to the wall.
The pro move: paint the slats AND the wall behind them in the same color before mounting. Sage green, warm terracotta, deep navy — the monochromatic effect is immediate and dramatic. Budget: $50-80 for a wall section roughly 6x8 feet. Time: a weekend (painting + drying + installation). Visual impact: wildly disproportionate to the investment.
Furniture & storage: 4 projects for smarter living
Furniture is where DIY becomes genuinely economical. The price gap between buying new and transforming secondhand is often a factor of five to ten. And contrary to what you might expect, the most impressive pieces aren't the hardest to execute.
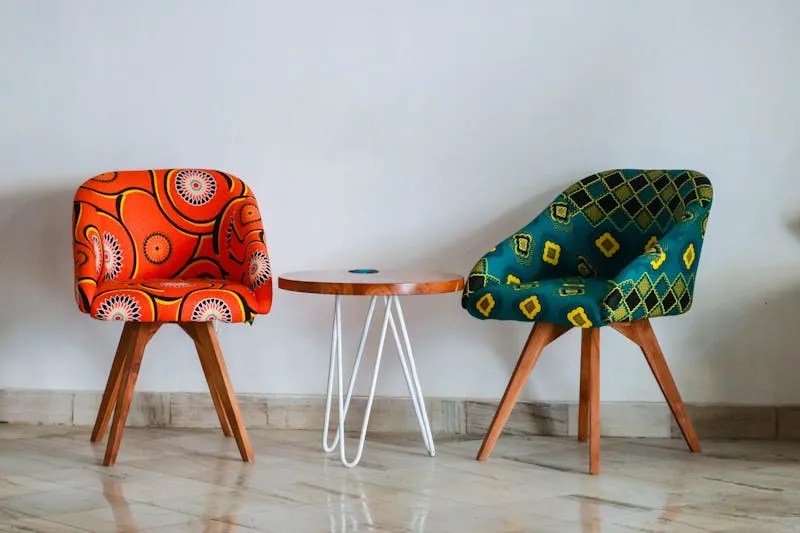
5. Thrift store furniture makeover — the star transformation
Goodwill, Facebook Marketplace, estate sales, garage sales: solid wood dressers, buffets, and nightstands can be found for $20-50 on average. And typically, three steps are all it takes to transform them completely. Light sanding (120 grit — you don't need to strip the wood, just scuff the surface for paint adhesion), a bonding primer, and two coats of chalk paint or matte acrylic. Swap out the hardware — brushed brass knobs or ceramic pulls — and you've got a piece that could pass for showroom furniture.
My most concrete advice: the paint color makes everything. Skip white (too predictable) and lean into saturated or moody tones. Sage green, peacock blue, terracotta, matte black — these colors turn a forgettable piece into a statement. And if you're unsure about the shade, Farrow & Ball publishes its trend palettes annually. It's reliable inspiration, even if you use more affordable paints for the actual project.
6. Hanging rope shelf
This is the project that takes 45 minutes and convinces people you have an innate sense of design. A wooden board (oak, pine, or even a sanded pallet plank), four holes drilled at the corners, thick jute or cotton rope, and a ceiling or wall hook. That's it.
The key to a hanging shelf that looks intentional: proportions. The board should be longer than it is wide (24x6 inches minimum), and the ropes should hang with enough slack to create a slight sway. Too taut and it loses all its charm. Above a desk, in a kid's room, or in the entryway for keys and a small vase — it works anywhere.
7. Epoxy resin coffee table
This one falls in the "ambitious weekend project" category. Epoxy resin is a clear (or tinted) product that, once poured into a mold or onto a wood surface, cures into a glass-like finish that's genuinely arresting. The famous "river tables" — those pieces with a blue resin river running through the middle — were born from this technique.
The realistic first attempt: a coffee table top. A piece of raw-edge wood with natural imperfections (knots, cracks, live edge), epoxy resin colored with pigment powders, and a melamine mold. Pouring takes 30 minutes. Curing takes 48-72 hours. Final sanding and polishing, half a day. Budget: $60-120 depending on size. The result? A piece people touch while asking "what is this material?"
8. Pallet bench — the functional classic
Pallet furniture had its viral moment around 2015, and many assume the trend is over. Not quite. What's changed is the expected level of finish. Forget raw pallets stacked in a corner of the patio. A pallet bench in 2025 gets sanded at 80 grit then 120, sealed (varnish or stain for outdoors, wax for indoors), and topped with custom cushions (upholstery foam cut to size is available at most fabric stores).
The entryway bench is the most practical application: two pallets stacked, sanded, sealed, topped with a cushion and a couple of throw pillows. It's a piece of furniture you actually use — for putting on shoes, setting down groceries, storing footwear underneath. Budget: $0-30 (reclaimed pallets) + $40-60 (cushion and sealant). Time: a weekend.
Light & ambiance: 3 projects for mood lighting
Lighting makes the mood. Literally. A living room lit by a single overhead fluorescent is a post office. The same room with three soft light sources — a table lamp, candles, a string of warm lights — is a sanctuary. And here's the thing: all three can be handmade.
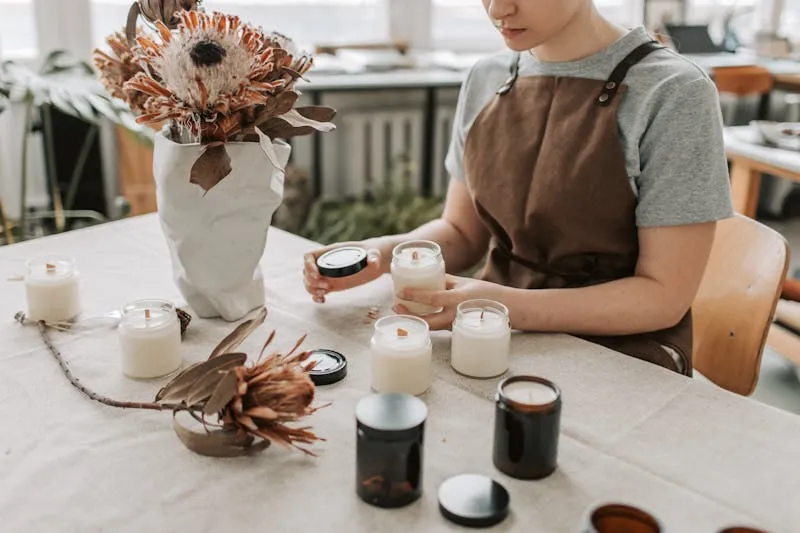
9. Handmade scented candles
If you only make one project from this entire list, make this one. Because it's simple, fast, deeply satisfying, and once you understand the process, you'll never again pay $35 for a scented candle without feeling a twinge of indignation. The markup on candles is one of the beauty industry's best-kept open secrets.
The basic kit: soy wax (natural, low melting point, excellent scent throw), pre-waxed cotton wicks, candle fragrance oils (important: not pure essential oils, which behave unpredictably during combustion), and containers. The containers are where your creativity comes in: ceramic pots, vintage teacups, whiskey glasses, small handmade concrete bowls. Anything heat-resistant works.
The process: melt the wax in a double boiler (never microwave — temperature control is impossible), add fragrance when the wax reaches 140°F (a kitchen thermometer is non-negotiable), pour into the container with the wick centered (held in place by two chopsticks laid across the top). Curing time: 24 hours. Cost per candle: $3-5. Perceived value: $30 minimum.
10. Concrete table lamp — domestic brutalism
Creative concrete (sold as a ready-to-mix powder at craft stores) is a magical material for DIY decor. You pour it into a mold — a cut plastic bottle, a milk carton, a paper cup — and 48 hours later, you have a solid, textured object that looks like it came from a Scandinavian design studio.
For a table lamp: a cylindrical or conical mold, a hole planned for the electrical cord (a plastic tube inserted before pouring does the trick), and a lamp socket kit with a fabric-covered cord (available from lighting specialty retailers, $12-20). A vintage-style Edison LED filament bulb for the finishing touch. Result: a one-of-a-kind table lamp that's heavy, textured, and has real presence. Total budget: $20-30.
11. Custom string lights — not the IKEA kind
Forget the $6 LED strings that blink like a shopping mall Christmas tree. A high-end DIY string light starts with a basic warm-white LED strand, onto which you add handmade decorative elements: cotton ball spheres (made by wrapping cotton string around inflated balloons, then deflating once dry), Japanese paper origami shapes, or dried flowers attached with fine wire.
The result is incomparably more beautiful than any mass-produced alternative. And crucially, it's adaptable — you swap the decorative elements by season, mood, or room. In a bedroom, draped above a bookcase, along an exposed beam: it's the perfect ambient lighting for winter evenings. Budget: $15-25.
Small objects: 4 accessories that change everything
It's not the furniture that gives a home personality — it's the details. A tray on the coffee table, a vase on the shelf, a jewelry dish in the bathroom. And this is precisely where DIY excels: these objects are simple to make, inexpensive, and have a visual impact that's wildly disproportionate to their cost.
12. Terrazzo tray — marble effect without the price tag
Terrazzo is that composite material you see everywhere in design magazines — surfaces studded with chips of marble, quartz, or colored glass. In DIY form, it's surprisingly straightforward. The base: plaster or white quick-set cement, colored stone or marble chips (available online, about $10 for a bag that'll make several projects), and a flat mold (a silicone tart pan works perfectly).
Pour the plaster, scatter the chips before it sets, wait 24 hours, unmold, sand the edges smooth. A coat of matte sealant and you've got a tray that looks indistinguishable from the $120 version at a design boutique. Yours cost $15. Use it as a candle tray on the coffee table, a graphic trivet, or as a photo backdrop for your Instagram stories. Yes, the influencers know this trick well.
13. Asymmetric mirror — the statement piece
Those organic, asymmetric mirrors with irregular frames — the ones you see in Scandinavian decor stores at indecent prices — can be made at home. The technique: buy a basic round mirror (IKEA sells them for under $10), cut an asymmetric frame from thick foam board or thin MDF, glue the mirror on, then cover the frame with air-dry clay, modeling compound, or even painted papier-mâché. The irregular shape is the point — symmetry is neither expected nor desired.
Even simpler variation: the blob mirror in air-dry clay. Shape an organic border around an adhesive mirror, let dry, paint. The blob mirror went viral on TikTok for a reason: it's beautiful, it's easy, and it costs about $12 in materials. In a bathroom, an entryway, or propped on a shelf — it's an immediate eye-catcher.
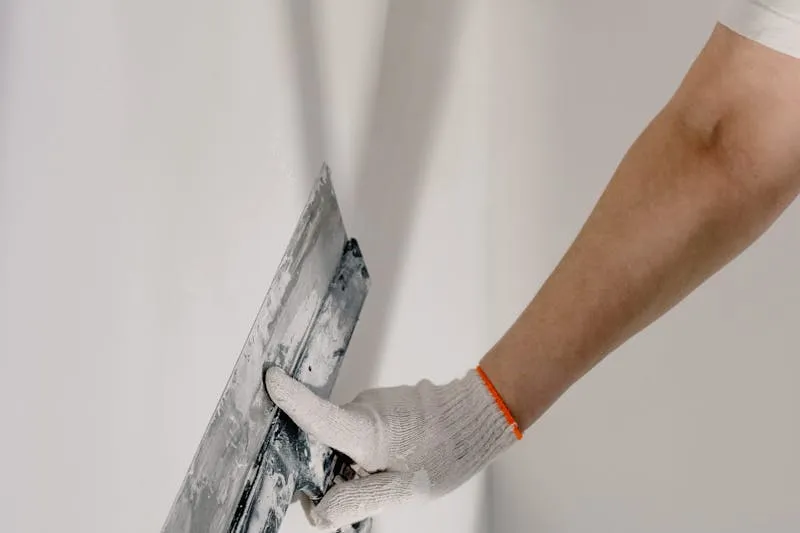
14. Textured vases — the convincing faux-artisan
Got a smooth, characterless glass vase? Transform it. The textured vase technique involves applying a decorative compound (wall filler or fine plaster) to the outside surface of the vase in irregular layers, creating the look of handmade terracotta or stoneware pottery. Once dry, a coat of matte paint (off-white, beige, terracotta) and genuinely no one — not one person — will guess it started life as a $3 glass vase from a dollar store.
The result is so convincing that several DIY creators have built their entire Instagram presence around this technique. The key: vary the shapes of your starting vases (wine bottle, carafe, mason jar) to create a collection that's cohesive but not uniform. A trio of textured vases on a shelf or mantelpiece says "I visited a ceramics studio in Provence." Except you didn't — and your wallet knows it.
15. Resin art tray — fluid art for the coffee table
Art resin (also called resin art or fluid art) lets you create trays, coasters, and decorative pieces with spectacular color effects — marbled patterns, geode effects, ocean scenes, aurora borealis. The principle: pour colored epoxy resin (tinted with powder or liquid pigments) onto a flat surface (wood panel, canvas, silicone mold), then create patterns by tilting, blowing (with a heat gun or hair dryer), or dropping contrasting colors into the wet surface.
This is the most "wow" project on this list — and also the one that demands the most practice. First attempts are rarely Instagram-ready. But second attempts? Very often are. A starter kit (resin, pigments, molds, gloves) runs about $40-50, and it's enough to make roughly ten pieces. Geode-style resin coasters make a handmade gift that impresses every single time.
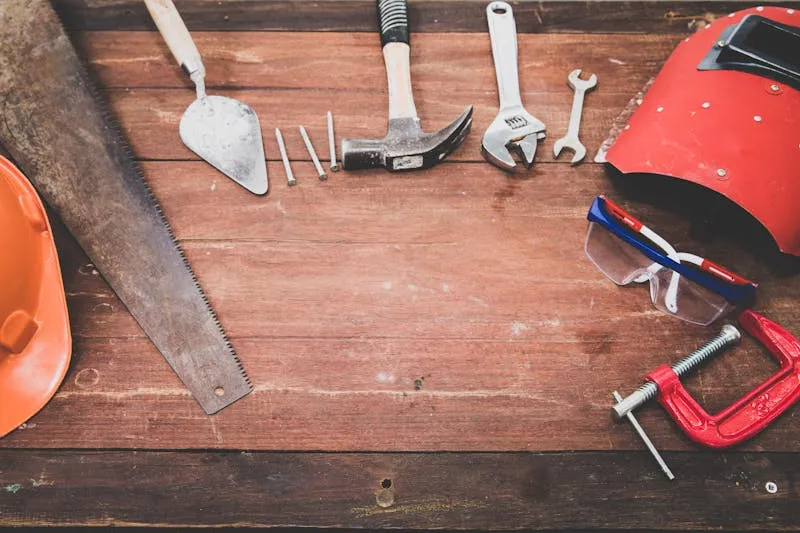
Essential materials and tools to get started
You don't need a workshop. Most of the projects above can be done on a table covered with a drop cloth or newspaper. But certain tools are foundational investments that'll serve every future project.
The essentials (total budget: $40-60):
- A hot glue gun — the universal DIY decor tool ($10-15)
- Multi-grit sandpaper — 80, 120, 240 ($5)
- A precision craft knife + cutting mat ($12-15)
- Quality painter's tape — FrogTape is the gold standard ($8)
- Flat brushes in various sizes — craft quality is fine, no need for artist-grade ($5-10)
- A tape measure and a small level ($5)
Recurring consumables:
- Construction adhesive for wood projects
- Hot glue sticks (refills)
- Acrylic paint — white, black, and 2-3 colors from your chosen palette
- Cotton cord in 3mm and 5mm for macramé and hanging projects
A piece of advice I wish I'd received early on: don't buy everything at once. Start with one project, buy what you need for that specific thing, and you'll find that your toolkit builds itself naturally over time. Each new project adds a tool or consumable to your collection. Before you know it, you're equipped for almost anything.
The 5 most common mistakes (and how to avoid them)
After dozens of projects (and just as many instructive failures), here are the traps everyone falls into at the beginning. Myself very much included.
Mistake #1: Skipping surface preparation. This is the most common one by far. You want to repaint a piece of furniture, you crack open the paint can, and you go straight in. Six months later, the paint is peeling because you didn't sand or apply a bonding primer. Preparation is 50% of the final result. It's not glamorous, but it's non-negotiable.
Mistake #2: Using bargain-bin materials. Not on everything — cheap tools are usually fine. But materials (paint, resin, wax, adhesive): no. A low-quality paint will require four coats instead of two, cover poorly, and have a dull finish. It's a false economy. For paint specifically, brands like Benjamin Moore, Behr Premium, or Rust-Oleum Chalked offer the right balance of quality, coverage, and value.
Mistake #3: Trying to finish everything in one afternoon. Drying time is non-compressible. A coat of paint feels dry to the touch in 2 hours but isn't fully cured for 24. Resin takes 48-72 hours. Plaster needs at least 12 hours. If you stack coats too quickly, everything bubbles, cracks, or stays tacky. Patience is the single most important skill in DIY — more than any technique.
Mistake #5: Copying a tutorial exactly instead of adapting it. Tutorials are starting points, not rigid instructions. Adapt the dimensions to your space, the colors to your palette, the materials to what you can actually source locally. The best DIY projects are the ones that diverge from the model — not the ones that replicate it to the millimeter. Your imperfections are features, not bugs.
Frequently asked questions
What's the easiest DIY decor project for a complete beginner?
Macramé wall hangings and handmade candles are the two most accessible entry points. Macramé only requires mastering two knot types and produces a visible result within hours. Candle-making is literally: melt, scent, pour, wait. No complex technique, no special equipment, and an immediately satisfying outcome. I'd recommend starting with one of these before attempting resin or concrete projects, which involve more material handling and stricter safety requirements.
How much should I budget to start with DIY home decor?
A first project can cost between $10 and $30, materials included. The basic tool kit (glue gun, sandpaper, craft knife, brushes) is a one-time investment of $40-60 that serves every subsequent project. In total, for your first 3-4 projects, budget $80-120. That's the equivalent of a single decor object from a retail store — except you'll have four unique pieces instead of one mass-produced one.
Is DIY decor actually more sustainable than buying new?
In most cases, yes. Furniture makeovers from thrifted pieces prevent new manufacturing and the associated transport emissions. The EPA confirms that reuse is always preferable to recycling and certainly to landfill disposal. That said, some DIY materials aren't environmentally benign: epoxy resin is a petrochemical product, and certain paints contain solvents. The most sustainable approach: prioritize natural materials (wood, cotton cord, plant-based wax, plaster) and secondhand sourcing for your base pieces.
Where can I find quality materials for DIY decor projects?
For wood and tools: Home Depot, Lowe's, and local salvage yards (often free reclaimed wood). For macramé cord, preserved moss, resin pigments: specialty online retailers like Etsy sellers or dedicated craft supply stores. For furniture to makeover: Goodwill, Facebook Marketplace, estate sales, and garage sales. A habit worth building: always compare prices by weight or length, not by package. Some "craft kit" packaging repackages basic materials at significant markups.
How long does a typical DIY decor project take?
It varies by project, but here are realistic timeframes (excluding curing/drying): macramé wall hanging, 2-4 hours. Candles, 30-45 minutes per candle. Full furniture makeover, 4-6 hours spread across 2 days (sanding + primer day one, paint + topcoat day two). Wood slat wall, 1 full day. Resin table, 2-3 hours of active work + 72 hours of curing. The classic mistake: underestimating drying time and trying to finish everything in one session. Plan for drying days, not just working hours.