There's a precise moment when it happens.
You're at the farmer's market on a Saturday morning in late February, and you pick up a tomato. A proper tomato — deep red, firm, sold at a premium by a trader who knows their produce. You hold it to your nose. And it smells of absolutely nothing. Not one thing. A red plastic ball with a "tomato" label.
And then the memory arrives. You're a child, in your grandmother's garden. It's warm. You've just pulled a tomato directly from the plant — warm from the sun, with that green, sharp smell that stays on your fingers for hours, the smell you didn't know had a name, which is simply the smell of summer, of a real tomato, of a garden that grows things.
That tomato cost nothing. It was unrepeatable.
This contrast — between the supermarket tomato and the olfactory memory of the garden tomato — is what leads people to reach for a trowel. And it places them immediately in front of a very practical question: where do you begin?
This guide answers everything. Plot size, soil preparation, the vegetables that even first-time growers reliably succeed with, a month-by-month calendar, watering, and crop rotation. With verified information, real figures, and my honest views on what genuinely works versus what garden centres would like to sell you.
Planning your first plot: size, location, type
The number one rule for a first vegetable garden — the rule that experienced gardeners repeat endlessly and everyone ignores — is to start small. Genuinely small.
A 2m × 3m space (roughly 6ft × 10ft) is entirely sufficient for a first year. Six square metres allows you to grow tomatoes, courgettes, salad leaves, radishes and herbs — enough to meaningfully improve your summer meals. And six square metres takes about twenty minutes a week to maintain, which is compatible with an ordinary life.
In the UK, the allotment tradition offers an instructive cautionary tale: a standard full allotment plot is 250 square metres. The National Allotment Society reports that the majority of new plot holders take on the full space in year one and then struggle. Most experienced allotmenteers recommend taking on a half plot, or even a quarter, to begin. The same principle applies to a home kitchen garden.
Most beginner vegetable gardens fail not because growing things is difficult, but because the chosen area is too large for the time available. A poorly maintained 20m² plot produces less, demoralises more, and ends the season buried in weeds. A well-kept 6m² plot produces more and generates the enthusiasm to expand the following year.
Location: the three non-negotiable criteria
1. Sun. Vegetables need a minimum of six hours of direct sunlight per day. Tomatoes, courgettes and French beans want eight to ten hours. Track the shade cast by trees, fences and buildings at different times of day before choosing your spot. A sunny small space will always outperform a large shaded one.
2. Water access. You will water regularly — particularly in July and August. A plot far from a tap or water butt becomes a practical burden very quickly. Distance to water is a very real reason for abandonment mid-season.
3. Shelter from wind. Wind dries out soil, breaks tall plants and hampers pollination. A sheltered plot (behind a hedge, fence, or wall on the west or north side) grows more vigorously. Note, however: shelter must not create shade.
Raised beds vs in-ground vs containers
In-ground growing: The least expensive and most productive long-term option. It requires working with your existing soil, which can take effort in year one — particularly if you're starting on compacted or heavy clay soil. Plants have unlimited access to the soil's resources.
Raised beds: The most popular choice among beginners, and for good reason. You control soil quality entirely from the outset. Minimal digging required. The clear boundaries help with organisation and rotation. A 1.2m × 2.4m raised bed costs between £30 and £120 depending on materials (untreated timber, sleepers, galvanised metal). Fill with a mix of good-quality topsoil, compost and a little grit or sharp sand.
Containers and pots: The solution for balconies, terraces and small urban spaces. Ideal for herbs, cherry tomatoes, salad leaves and radishes. Key constraint: much more frequent watering (containers dry out rapidly), and the cost of compost can add up. Use the largest containers you can accommodate — bigger pots hold moisture better and give roots more room.
💡 Diana's tip
If you're torn between raised beds and in-ground growing, ask yourself: what's the current state of my soil? If your garden is compacted lawn or heavy clay that sets like concrete in summer, a raised bed filled with quality compost will give you far quicker results in year one, without the frustration of fighting difficult ground. If you already have decent, workable soil, go straight to in-ground growing. Don't spend money solving a problem you don't have.
The real budget: what you actually need versus what garden centres sell you
A well-merchandised garden centre can persuade you to spend £200–300 before you've grown a single thing. Reality is different. What you genuinely need:
- Essential tools (one-off): A fork or spade (£15–35), a rake (£10–20), a hand trowel (£5–10), a watering can (£8–15). Total: £40–80. You do not need a rotavator, a sophisticated greenhouse or an automated irrigation system to begin.
- Seeds: A packet of seeds costs £2–4. For a first 6m² plot, £20–30 in seeds covers everything you need for the season. Reliable UK suppliers: Thompson & Morgan, Suttons Seeds, Dobies.
- Compost and amendments: A 40L bag of good multi-purpose or vegetable compost costs £5–8. Two to three bags is sufficient for a first raised bed or to top-dress a small in-ground plot.
What you do not need in year one: specialist seed compost at £14 a bag (good multi-purpose compost works), complex liquid fertiliser programmes (compost is sufficient for most crops in year one), fancy slug deterrents (copper tape and physical barriers work, as does the beer trap).
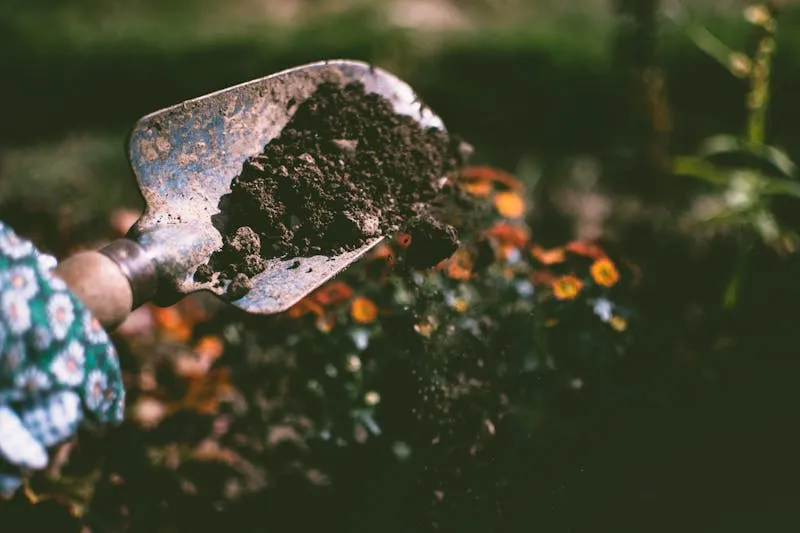
Understanding and improving your soil

Soil is the most valuable investment you can make in your vegetable garden. Poor soil with good seeds gives poor results. Good soil with ordinary seeds gives excellent results.
The jar test: know your soil composition in 24 hours
This simple test tells you the texture of your soil with no specialist equipment:
- Fill a clear jar two-thirds full of water
- Add about 5cm of soil from your garden
- Seal and shake vigorously
- Leave undisturbed for 24 hours
Result: sand sinks first (bottom layer), silt settles in the middle, clay forms on top. Organic matter floats. An ideal vegetable garden soil contains roughly 20–30% clay, 30–40% silt and 20–30% sand. A soil that's more than 50% clay retains water and becomes waterlogged. A very sandy soil drains too quickly and won't hold nutrients.
pH: the key to nutrient availability
Most vegetables grow best in soil with a pH between 6.0 and 7.0 (slightly acid to neutral). Outside this range, nutrients present in the soil become unavailable to plants — even if you fertilise generously.
A pH test (strips or a digital meter, available at garden centres, £5–15) is the most useful single investment of a first year. Acidic soil (pH below 6.0) is corrected with garden lime or calcified seaweed. Alkaline soil (pH above 7.5) is less common but can be addressed with sulphur or ericaceous compost blended in.
The RHS recommends testing soil pH every three to four years — it changes over time, particularly with rainfall (which tends to acidify soil gradually in the UK).
Improving your soil: the three essentials
Compost: The universal amendment. Whether homemade (a garden compost bin produces excellent compost in six to twelve months) or bought in bags, compost simultaneously improves sandy soils (better moisture retention) and clay soils (improved drainage). It adds nutrients and feeds the microbial life that makes nutrients available to plants. A good target for a vegetable garden: 5–7cm of compost applied to the surface each year.
Well-rotted manure: Richer in nutrients than standard compost, particularly useful for heavy feeders like tomatoes, courgettes and squash. Important: the manure must be well-rotted (dark, crumbly, no longer smell pungent). Fresh manure can burn roots and may introduce weed seeds. B&Q and most garden centres sell bagged well-rotted manure; stables and farms often give it away.
Mulch: A surface covering of organic material (straw, dried grass clippings, shredded leaves, wood chips) that reduces evaporation, suppresses weeds and gradually breaks down to enrich the soil. The RHS reports that a 7–10cm mulch layer can reduce water requirements by up to 50% in summer. It is one of the highest-impact, lowest-cost practices in the kitchen garden.
The no-dig method: simple and highly effective for beginners
The no-dig method, popularised in the UK by market gardener Charles Dowding (who has been growing vegetables commercially on no-dig beds for over thirty years and whose results have been studied by the BBC and Gardeners' World), consists of never turning the soil but instead applying compost and amendments on the surface.
This approach preserves soil structure, microbial life and the drainage channels created by earthworms. It is also considerably less physically demanding — a relevant point for a beginner. For a new raised bed or plot, the practical approach is simple: lay 15–20cm of quality compost directly on top of the existing lawn or ground, cardboard underneath if needed to suppress weeds, and plant straight into it. The vegetation below will die and decompose, enriching the soil from below.
💡 Diana's tip
The quickest way to assess your soil? Dig a hole about 30cm deep and look at what you find. Abundant earthworms? Excellent — your soil is alive and well-structured. Compact, grey soil with almost no life? It needs amendments before your first season. A genuinely healthy UK garden soil should have 150–400 earthworms per square metre. If you find none, you have your diagnosis — and the solution is simple: add compost and stop using chemical fertilisers, which acidify soil over time.
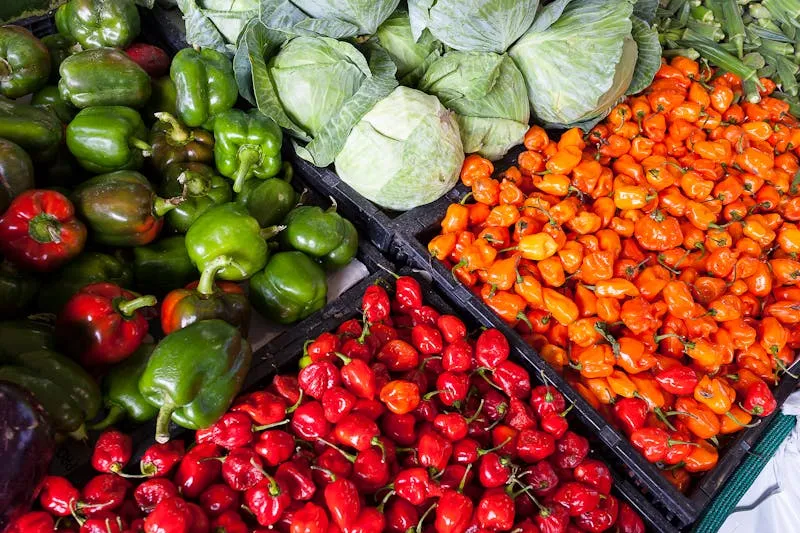
The 10 easiest vegetables for beginners
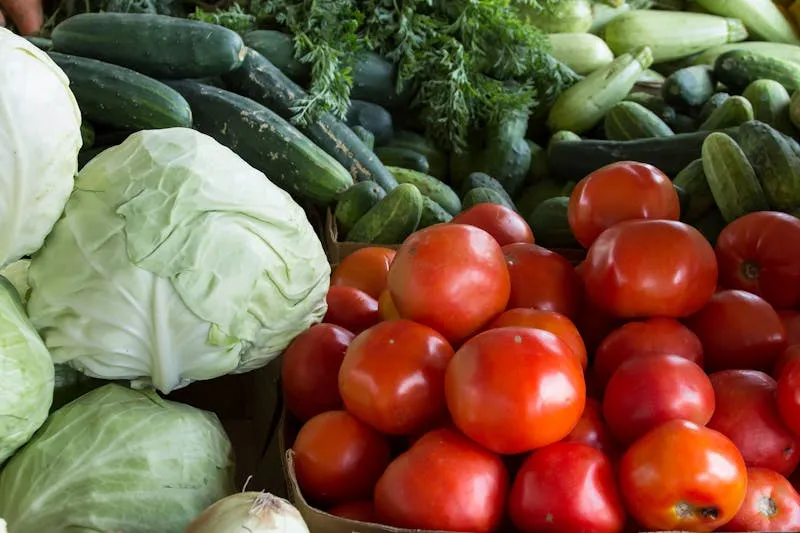
Among the hundreds of vegetables you could grow, some are far more forgiving than others. They tolerate irregular watering, slightly-too-dense sowing, forgotten fertilisation. Here they are, in order of ease:
1. Courgette — the indestructible producer
The courgette is the perfect beginner's vegetable. A single plant can produce 20–40 fruits over the season. It grows quickly (first harvest 55–65 days from sowing), tolerates heat, and its only real requirement is space: each plant needs about one square metre. Recommended varieties: Defender F1, All Green Bush, Costata Romanesco (more rustic). Key point: harvest them small (15–20cm) — a forgotten courgette becomes a marrow in 48 hours.
2. Salad leaves — the fastest harvest
Cut-and-come-again salad mixes (rocket, mixed leaves, lamb's lettuce) are ready to pick 30–45 days from sowing. Technique: harvest the outer leaves, and the plant regrows from the centre. Sowing a short row every two to three weeks ensures continuous production from April to October. They grow very well in containers, and tolerate partial shade better than most vegetables — useful under taller plants.
3. Radishes — seed to table in four weeks
Radishes are the fastest crop in the kitchen garden: 25–30 days from seed to harvest. Excellent for filling gaps between slower-growing crops and for introducing children to gardening. Sow in rows, thin to 3cm spacings. One rule: don't leave them in the ground too long or they become hollow and painfully peppery.
4. Cherry tomatoes — immediate satisfaction
Technically more demanding than the first three, cherry tomatoes remain accessible to beginners because they are highly productive and significantly more disease-resistant than beefsteak or standard varieties. A well-managed cherry tomato plant can produce 2–4kg of fruit in a season. Beginner varieties: Gardener's Delight (the classic UK choice, consistently excellent), Sungold (remarkably disease-resistant, very sweet), Sweet 100. Requires staking, and ideally a liquid tomato feed from first flowering.
5. French beans — dwarf or climbing, unfussy
French beans grow quickly, produce abundantly and enrich the soil with nitrogen (being legumes). Dwarf varieties (50–60cm) need no support. Climbing varieties (up to 2m) produce for longer but need a trellis or poles. Sow directly outdoors from mid-May. Recommended dwarf variety: The Prince or Safari.
6. Herbs — the most cost-effective crops
For the ratio of value to space to cost, herbs are unrivalled. A pot of supermarket basil costs £1.50 and lasts a week. A garden basil plant produces all summer. The same logic applies to parsley, chives, coriander and thyme. Chives and mint are particularly indestructible. Mint: give it its own pot, always — it will otherwise colonise the entire bed.
7. Peas — the children's favourite
Peas eaten straight from the pod, still warm from the sun, are an experience unlike any other. They can be sown early (March to April — they tolerate light frost), grow quickly on a simple support, and are ready in 70–80 days. Limited yield per square metre but unmatched eating quality. Recommended variety: Kelvedon Wonder (compact, very productive, RHS Award of Garden Merit).
8. Swiss chard — beautiful and productive
Chard is simultaneously ornamental and productive. Coloured varieties (yellow, red and orange stems) are genuinely striking. It grows in difficult conditions (poor soil, heat, partial shade), produces from May to November, and regrows after each cut. One of the most resilient plants in the kitchen garden. Recommendation: Bright Lights for the visual impact.
9. Potatoes — satisfying, especially for breaking in new ground
Technically not the highest-yielding crop per square metre, potatoes have two specific virtues for the beginner: their cultivation naturally breaks up compacted soil (the tubers physically disrupt the ground as they swell), and the harvest — digging up potatoes as though finding buried treasure — is one of the most satisfying experiences in the kitchen garden. Plant certified seed potatoes from mid-March to April, 30–40cm apart. First earlies are ready in about 10 weeks.
10. Strawberries — technically a fruit, but everyone grows them
Strictly speaking, strawberries are a fruit. But no beginner's growing guide is complete without them. Plants are easy to find at any garden centre, they are perennial (they come back every year), they produce in their first season, and children can monitor them directly on the plant. Recommended varieties: Cambridge Favourite (reliable, good flavour), Honeoye (very early, productive), Mara des Bois (exceptional flavour, everbearing).
💡 Diana's tip
Resist the catalogues — their abundance and beautiful photography will lead you to order too many varieties. For your first year, choose five vegetables from this list and grow them well, rather than dispersing your space and attention across ten different crops. The deliberate limitation is the most productive single decision you can make in year one. Monty Don has made this point repeatedly on Gardeners' World: beginners who start small consistently end up better gardeners than those who start big.
Month-by-month growing calendar

The calendar below is based on a typical UK growing season for most of England and Wales. Scotland and northern regions: add two to three weeks to all outdoor sowing dates. The south-west and coastal areas: you may be able to start slightly earlier. The key variable in the UK is the last frost date — typically mid-April in the south, mid-May in the north and higher ground.
January — February: planning and ordering
The kitchen garden season starts before the first seed goes in. January and February are planning months:
- Draw a plan of your plot — paper is fine; there are also free online tools (Vegplotter, GrowVeg)
- Order seeds — specialist catalogues offer a much wider range than garden centres, and many varieties sell out: Thompson & Morgan, Suttons Seeds, Chiltern Seeds, The Real Seed Catalogue
- Check and replace any broken tools
- Prepare raised beds and containers
- If you have an existing plot: apply compost to the surface (no-dig approach)
From late February, you can start the first indoor sowings of aubergines and peppers (long-season crops that need 10–12 weeks before planting out).
March: indoor sowing begins in earnest
March is the pivot month. On a sunny windowsill or under a propagator lid, sow:
- Tomatoes (8–10 weeks before planting out)
- Aubergines and peppers (if not already started)
- Celery (8–10 weeks)
- Cucumbers (4–5 weeks)
Outdoors from mid-March, once the soil is workable (not frozen or waterlogged): peas, spinach, carrots, radishes, salad leaves. These tolerate light frost and will germinate in cool soil. The RHS recommends using a soil thermometer — most seeds germinate poorly below 7°C.
April: the outdoor season opens
April is the month of outdoor sowings in volume:
- French beans (after mid-April in the south, May in the north)
- Turnips, beetroot, spring onions
- New rows of salad leaves every two weeks
- Radishes continuously
- Courgettes and squash — indoors in pots (they'll be ready to plant out after the last frost)
Indoors: pot on tomato seedlings into larger containers if roots are showing at the base. Begin hardening off — taking plants outside for a few hours each day to acclimatise them to outdoor conditions.
May: planting out and the last frost
In the UK, the last frost date varies significantly by region — typically mid-April in Cornwall and coastal areas, and mid-May across much of England, with later dates in Scotland and upland areas. The RHS frost map is the most reliable reference. Before your local last frost date, do not plant tender crops outdoors.
- Plant out tomatoes (after last frost, into a sheltered sunny spot)
- Direct sow courgettes, squash and cucumbers outdoors
- Plant out peppers and aubergines (in the warmest possible spot — against a south-facing wall is ideal)
- Plant strawberries
- Direct sow French beans
⚠️ The last frost date: the most common beginner mistake
UK garden centres sell tomato and courgette plants from April — sometimes earlier. The temptation to buy them and plant them out during a warm April spell is entirely understandable. And then comes a May frost that kills everything overnight. The last frost date in your specific location (your county, your microclimate, the frost pocket at the bottom of your garden) is the single most important date in your growing calendar. Check the Met Office frost risk maps, ask neighbouring allotmenteers, and err on the side of caution in your first year.
June — August: maintenance and harvest
- Regular watering (mornings, at the base of plants)
- Mulching if not already done — essential during dry spells
- Side-shooting tomatoes (removing the sideshoots that form in the junction between stem and branch)
- Continuous harvests of salad, radishes, courgettes, beans
- First tomatoes and cucumbers from late July
- In July: sow autumn crops (carrots, beetroot, turnips for the autumn harvest)
September — October: autumn harvests and winter preparation
- Harvest the last tomatoes, peppers and squash before the first frosts
- Sow spinach, rocket, lamb's lettuce and hardy salad leaves for autumn and winter harvest
- Plant garlic (mid-October to November — from the Garden House or any good garden centre)
- Sow broad beans in sheltered areas for overwintering
- Clear spent crops and add them to the compost heap
November — December: soil improvement and planning
- Apply compost and well-rotted manure to the surface
- Protect overwintering crops with fleece or cloches
- Clean, oil and store tools properly (they'll last far longer)
- Plan next year's rotation — note what worked well and what didn't
- Order seeds early — the best varieties from Thompson & Morgan and Suttons sell out
Watering and feeding your vegetable garden

When and how much to water: the finger test
The golden rule of kitchen garden watering: water deeply and infrequently rather than shallowly and often. Deep watering (penetrating 20–30cm) encourages roots to go down in search of moisture. Shallow watering keeps roots at the surface and creates plants dependent on daily intervention.
The finger test: push your finger 5cm into the soil. If it's dry at that depth, water. If it's still moist, wait another day.
Watering needs vary by crop and weather:
- Tomatoes, courgettes, cucumbers: 2–3 times a week in warm weather; consistent moisture is particularly critical for tomatoes to prevent blossom end rot and splitting
- Salad leaves, radishes, herbs: 1–2 times a week
- French beans: Regular watering especially at flowering
- After rainfall: Always check before watering — UK summer rain often provides more than enough
Mulch: the secret weapon against summer drought
A 7–10cm mulch layer reduces soil evaporation by 40–60% (RHS data). In practical terms: a mulched kitchen garden requires roughly half the watering of a bare soil. It also suppresses weeds (which can't germinate without light) and provides a continuous supply of organic matter as it breaks down.
Suitable mulching materials: straw (the classic choice), dried grass clippings (leave them for 24 hours before applying — fresh clippings can compact and go slimy), shredded autumn leaves, cardboard (excellent for paths and between beds), wood chips (ideal for paths, avoid direct contact with vegetable stems).
Feeding: what your crops actually need
A soil well-amended with compost at the outset covers the nutritional needs of most crops for a full season. But some heavy feeders benefit from additional inputs:
Tomatoes: From the first flowers, apply a liquid feed high in potassium (K) to support fruit development. A weekly or fortnightly liquid tomato feed — Tomorite is the UK market standard — is sufficient. An organic alternative: comfrey tea (comfrey leaves steeped in water for two weeks; dilute 1:10 before use).
Courgettes and squash: Heavy nitrogen (N) feeders. A top-dressing of well-rotted compost around the base mid-season accelerates growth.
Leafy vegetables (salads, spinach, chard): Respond well to nitrogen. Liquid seaweed feed (available at all garden centres) is the simplest option; nettles steeped in water for two weeks provide a homemade equivalent.
💡 Diana's tip
If there's one thing to remember about feeding: root vegetables (carrots, parsnips, radishes) must NOT be planted in recently manured or heavily nitrogen-fertilised ground. This produces forked, misshapen roots with abundant foliage and very little edible root — the classic beginner disappointment with carrots. For root crops, sow into soil that was manured or composted the previous season, not the current one. This is the single most common cause of disappointing carrot harvests.
Crop rotation: why it matters and how to do it

Crop rotation means never growing the same botanical family of vegetables in the same place in consecutive years. It is one of the foundational practices of sustainable kitchen gardening.
Why it's essential
Three main reasons:
1. Disease prevention. Pathogens (fungi, bacteria) and certain pests accumulate in the soil when the same crop is grown in the same place repeatedly. Blight on tomatoes and potatoes, club root in brassicas, carrot fly — these problems intensify with repeated monoculture. Moving the crop breaks the cycle.
2. Nutrient balance. Different plant families consume different nutrients. Legumes (beans, peas) enrich the soil with nitrogen via bacteria in their root nodules. Brassicas (cabbages, broccoli) are heavy nitrogen consumers. Following legumes with brassicas in the same space lets you use the fixed nitrogen from one crop to feed the next.
3. Structural improvement. Different crops interact with soil structure differently. Deep-rooted crops like parsnips break up compacted layers. Ground-covering crops suppress weeds.
The four-group rotation: the most practical method
For a beginner kitchen garden, divide your space into four zones and rotate these four groups each year:
| Group | Crops included | Effect on soil |
|---|---|---|
| 1. Legumes | Beans, peas, broad beans | Fix nitrogen, improve structure |
| 2. Brassicas | Cabbages, broccoli, kale, turnips, radishes | Use the nitrogen left by legumes |
| 3. Root crops | Carrots, parsnips, beetroot, potatoes | Prefer lighter soil, not freshly manured |
| 4. Fruiting crops | Tomatoes, courgettes, cucumbers, peppers | Heavy feeders, compost-rich soil |
Rotation sequence: Legumes → Brassicas → Root crops → Fruiting crops → back to Legumes. Each group stays in one location for the year, then moves to the next position the following year.
⚠️ Tomatoes and potatoes: the Solanaceae problem
Tomatoes, potatoes, aubergines and peppers all belong to the same botanical family: the Solanaceae. Never follow one with another in the same space. Better still: allow at least three years (ideally four) before the same family returns to a given spot. The diseases that affect these plants — blight (Phytophthora infestans), black scurf, and several root diseases — overwinter in the soil and strengthen with each cycle if the same family returns. This is particularly critical in UK conditions where late blight pressure is high in wet summers.
Simplified rotation for small spaces
If your plot is too small for a proper four-group rotation, adopt at minimum this rule: never grow the same crop in the same spot in consecutive years. Even a one-metre shift helps in a small space. And keep tomatoes and potatoes on their own side of the plot, alternating their exact position each year.
Classic beginner mistakes — and how to avoid them
These are not theoretical warnings. They are the most common reasons why first-year kitchen gardens underperform, demand too much time, or are abandoned in August.
Mistake 1: starting too large
We covered this in the introduction, but it bears repeating: a 20m² plot requires 3–4 hours of work per week in summer. A 6m² plot requires 30–45 minutes. The difference is not proportional to output — it is disproportionately hard work. Start at 6m², expand with full knowledge of what you're taking on the following year.
Mistake 2: not testing the soil before planting
Planting in unsuitable soil is like putting fuel in a seized engine. A pH test (£8) and a texture test (the jar method) prevent a whole season of disappointing results. It's fifteen minutes of preliminary work for six months of gardening.
Mistake 3: sowing too densely
Beginners sow too thickly because seeing lots of seeds in the ground feels reassuring. Result: plants compete for light, water and nutrients. Follow spacing guidelines on seed packets and, crucially, thin without hesitation. Thinning is psychologically difficult for beginners — it feels wasteful to remove perfectly viable seedlings. But ten well-spaced carrots with room to develop will always outperform thirty crowded ones.
Mistake 4: erratic watering
Watering every day in small amounts is less effective than watering twice a week deeply. And watering over the leaves in full sun encourages fungal diseases and scorch. Simple rule: water in the morning, at the base of plants, deeply. If you can install even a basic drip system, it's the most cost-effective investment after compost.
Mistake 5: ignoring pests until the damage is done
In the UK, the primary threat is slugs. Slugs are active at night and after rain, and they are capable of destroying an entire row of seedlings in a single evening. They don't announce themselves. Integrate a quick check (five minutes, twice a week) into your gardening routine. Turn leaves over, look at the base of stems, check the soil around seedlings. Early detection is the difference between a minor intervention and a catastrophic loss.
Mistake 6: buying tomato plants too early from garden centres
UK garden centres sell tomato plants from April — sometimes earlier, when they're also selling Easter eggs and garden furniture in the same aisle. Beginners buy them in a warm April spell and plant them out. Then comes a May frost. The plants may survive but their growth is set back significantly, and they produce later than a plant that went out after the last frost. If you buy plants in April, keep them in a frost-free but unheated space (porch, garage with a window, greenhouse without heating) until the last frost date for your area.
FAQ: your questions, my direct answers
What size should a first vegetable garden be?
2m × 3m (approximately 6ft × 10ft) is the ideal size for year one. This space is sufficient for 5–7 different crops, can be maintained in 30–45 minutes a week during the season, and lets you learn the fundamentals without overextending. If you have a balcony or terrace, containers work well: a 40cm × 60cm trough is adequate for salad leaves, herbs and radishes, and a 40L pot supports a cherry tomato plant well. Don't exceed 10–15m² in year one — expand in full knowledge in year two.
What is the absolute easiest vegetable to grow?
The radish. Seed to table in 25–30 days, direct sown outside from March, almost no pest or disease problems, and it tells you clearly when it's ready (marble-sized, firm under the finger). If you were going to plant only one thing this season, plant radishes and enjoy the experience of eating something you grew in under a month. In second place: cut-and-come-again salad leaves. In third: courgettes, for the satisfaction of abundant production. All three are essentially foolproof in UK conditions.
Can I grow vegetables on a balcony?
Yes, with adaptations. The best crops for containers: salad and rocket (troughs 20cm deep are sufficient), radishes (same), herbs (a 15cm pot per plant), cherry tomatoes (minimum 40L pot per plant), dwarf French beans (30L pot). The main constraint is watering — containers dry out far faster than ground soil, particularly on an exposed balcony in summer. In hot weather, you may need to water daily. Self-watering containers (built-in reservoir) make this considerably more manageable and are a worthwhile investment for balcony growing.
Does no-dig gardening actually work?
Yes — and the evidence is solid. Charles Dowding has been running directly comparative trials between dug and no-dig beds on his Somerset market garden for over a decade, and the results have been consistent: no-dig beds produce comparable or higher yields while requiring far less physical effort and maintaining better soil structure over time. His approach is documented in detail in his books and on his website (charlesdowding.co.uk). For a beginner, the practical method is straightforward: lay 15–20cm of quality compost on your chosen space, cardboard underneath if needed, and plant directly into it without digging. The existing vegetation below will die and decompose, enriching the soil from beneath.
How do I manage slugs without chemicals?
Slugs are the number one pest in UK kitchen gardens — particularly in the wetter west and north. Effective methods without chemicals: beer traps (a shallow container sunk to ground level, filled with cheap beer — slugs are attracted and drown; empty and refill regularly); copper tape barriers around raised beds or individual containers (slugs dislike crossing copper); night-time torch-and-collect sessions after rain, especially in early season; wool pellets around vulnerable seedlings (available from garden centres, they deter slugs physically); and ferric phosphate pellets (sold as Slug Gone and similar — these are approved for organic use and are far safer than metaldehyde, which is now banned in the UK). Protection is most critical for seedlings and young plants — a mature courgette can tolerate a slug; a seedling cannot.
How much time does a vegetable garden take each week?
For a well-organised 6m² plot: 30–45 minutes per week in the quieter months (April, May, September, October), and 60–90 minutes per week at the peak of the season (June, July, August) — primarily watering, harvesting and light weeding. These figures assume a mulched plot (mulching dramatically reduces both weeding and watering time). Without mulch, double these estimates. Between November and February: 20–30 minutes per week maximum. These are realistic figures for a well-designed beginner plot — they don't include the enjoyable time you'll voluntarily spend simply being in the garden.
Do I need a compost bin for a good vegetable garden?
A compost bin is not essential, but it's one of the best investments in kitchen gardening (£20–40 for a basic council-supplied bin, or free in many UK local authorities). It converts organic waste — vegetable peelings, coffee grounds, grass clippings, fallen leaves — into high-quality compost in six to twelve months. A typical two-person household produces enough waste to make 80–120 litres of compost a year — sufficient to top-dress a 10–15m² plot. Without a compost bin, bought compost (£5–8 for a 40L bag from B&Q, Dobbies or any garden centre) works perfectly well for the early years.