I'm going to tell you something that changed my life in the kitchen. It was a Tuesday evening, nothing special, I was making roast chicken — my usual roast chicken, the one I'd been making for ten years: butter under the skin, lemon in the cavity, 180°C, done. And I was watching a video on the side where a Michelin-starred chef explained why he always blasted his poultry at very high heat for 10 minutes BEFORE reducing the oven temperature. The Maillard reaction, the juices staying inside, the skin crisping without the flesh drying out.
I tried it. Same chicken. Same oven. Same ingredients. And the result was so dramatically better that I had a proper culinary crisis: if a single technique could so radically transform a dish I thought I'd mastered… what else was I getting wrong?
The answer, after three years of obsessive research: quite a lot. But — and here's where it gets exciting — most of these "chef techniques" don't require a £12,000 range cooker, a Thermomix, and three sous chefs. They require understanding. The why. And a bit of practice.
Here are the ten techniques that have most transformed my everyday cooking — tested, botched, re-tested, and finally adopted. With a practical recipe for each one.
The 10 techniques
1. The Maillard reaction: the secret of colour and flavour
The Maillard reaction — named after French chemist Louis-Camille Maillard who described it in 1912 — is probably the single most important technique in all of cooking. It's the chemical reaction between sugars and amino acids that occurs above 140°C, creating that golden crust, those deep aromas, that complexity of flavour no seasoning can replace.
Top chefs master it instinctively. You can master it intellectually — and the result will be exactly the same.
The three golden rules
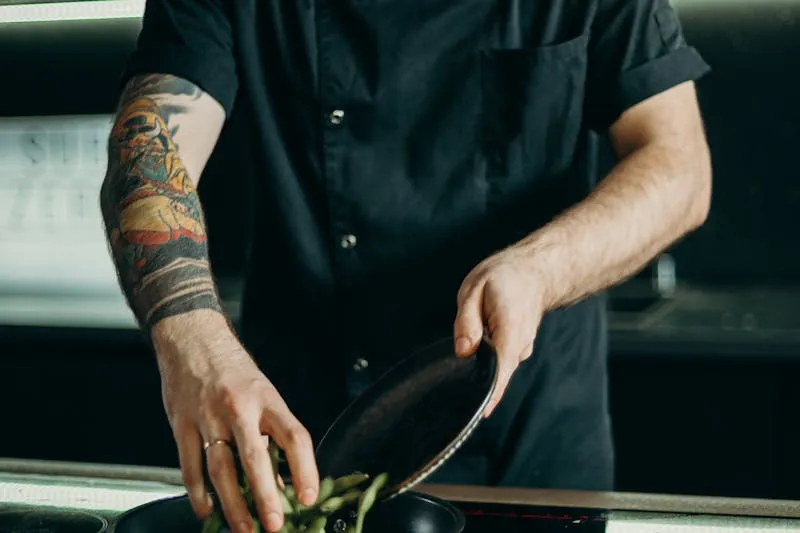
Rule 1: dry surface. Water boils at 100°C. The Maillard reaction begins at 140°C. As long as there's surface moisture, the temperature won't climb high enough. That's why a wet steak never browns — it steams. Solution: pat your meat with kitchen paper before searing. Chefs do this systematically. It's the difference between a caramelised crust and a grey, sad piece of meat.
Rule 2: don't overcrowd. When you put too many pieces in your pan, the temperature drops dramatically and the moisture released by the food can't evaporate quickly enough. Result: instead of searing, you're braising. Chefs never put more than three pieces in a pan. Got ten pieces? You do four batches. It takes longer, but the result is incomparably better.
Rule 3: don't touch. The Maillard crust needs time and contact. Every time you flip, lift, or move — you interrupt the reaction. Place your piece. Wait. Listen to the sizzle. When it diminishes, the surface moisture has evaporated and the reaction has begun. Then, and only then, you flip.
The chef's trick Add a pinch of bicarbonate of soda to your dry rub. Bicarb is alkaline, and the Maillard reaction is accelerated in alkaline conditions. Result: a more intense crust, more quickly, even on thin cuts. Several starred chefs use this technique for grilled meats — a quarter teaspoon is enough for 500g of meat.
Application recipe: the perfect steak
Take your steak out of the fridge 30 minutes beforehand. Pat it dry on both sides with kitchen paper. Sprinkle with fine salt (no pepper yet — it burns at high temperatures; add it after). Neutral oil in a cast iron or stainless steel pan — NOT non-stick, the surface is too smooth for proper Maillard. Heat on high until the oil just begins to smoke. Place the steak. Don't touch it for 3 minutes. Flip. 2 minutes. Add a knob of butter, crushed garlic, and a sprig of thyme to the pan, and baste the steak with the melted butter for 1 minute. Rest for 5 minutes on a wire rack. Pepper. That's it. And it's probably the best steak you'll ever make at home.
2. Emulsions: turning water and fat into magic

An emulsion is the stable mixture of two liquids that normally don't mix — water and oil, typically. Mayonnaise is an emulsion. Vinaigrette (when it holds) is an emulsion. Beurre blanc is an emulsion. And top chefs use them everywhere because they deliver that silky texture, that mouthfeel that makes you think "wow" without quite knowing why.
The problem is that emulsions are temperamental. We've all experienced the mayo that splits, the vinaigrette that separates, the sauce that "breaks." And we end up thinking it's a professional skill, that without the technique and experience, it's impossible.
Wrong. It's physics. And physics can be understood.
The principle: trapped droplets
In an emulsion, one liquid is dispersed as microscopic droplets within the other. To make it hold, you need an emulsifier — a molecule with one end that likes water and one end that likes fat, bridging the gap. In cooking, natural emulsifiers include: lecithin (in egg yolks), mustard (its mucilage), and casein (in dairy products).
The three rules
Temperature. Emulsions are more stable when both liquids are at similar temperatures. A failed mayo is often a cold egg straight from the fridge + room-temperature oil. Take your eggs out 30 minutes beforehand.
Gradual incorporation. You don't pour the oil in all at once. You start drop by drop — literally — then a thin stream once the emulsion has established. This is non-negotiable. Chefs never deviate from this rule, even when making their hundredth mayo of the day.
Constant agitation. The whisk (or stick blender) creates the shearing forces that "break" the oil into micro-droplets. Stop whisking, and the droplets regroup. The emulsion breaks.
The emergency rescue Your mayo has split? Don't panic. Take a clean bowl. Add a tablespoon of ice-cold water (or mustard). Gradually incorporate your failed mayo into it, whisking vigorously. The cold water plus renewed agitation will re-disperse the fat droplets. This works 9 times out of 10. It's the first thing culinary students learn — and it's an absolute game-changer.
Application recipe: express beurre blanc
Beurre blanc terrifies everyone. Yet it's one of the simplest sauces once you understand the mechanism. In a saucepan, reduce 100ml of dry white wine with 2 finely sliced shallots until only about 2 tablespoons of liquid remain. Lower the heat to minimum. Add 150g of very cold butter, cut into small cubes, one at a time, whisking constantly. The butter must melt slowly without boiling — it's the gentle heat that maintains the emulsion. If it starts to separate, add a spoon of cold water. Season, strain through a sieve. This sauce is extraordinary with white fish, asparagus, or ravioli — anything that calls for elegance without heaviness.
3. Low-temperature cooking: patience rewarded
When I understood low-temperature cooking, I felt like I'd been cheating my whole life in the kitchen. It's so simple, so logical, and so vastly superior to conventional cooking for certain preparations, you wonder why nobody told you about it sooner.
The principle: instead of cooking your meat at high temperature (200°C in the oven, screaming hot pan) and trying to catch it at that fleeting sweet spot between "underdone" and "overdone," you cook at the desired final temperature. You want salmon pink in the centre at 45°C? You cook at 45°C. It's physically impossible to overcook because the temperature of your cooking environment IS the target temperature.
In the oven: the accessible version
No need for an immersion circulator or vacuum sealer. Your oven, set to 80-90°C, is a perfectly functional low-temperature tool. Cooking time is longer — allow 2-3 hours for a piece of beef that would cook in 15 minutes in a pan — but the result is incomparably better: meat that's evenly pink from edge to edge, juicy, tender, without that grey-pink-red gradient you get with conventional cooking.
Food safety Low-temperature cooking demands extra rigour around hygiene. Below 54°C, pathogenic bacteria are not destroyed. Ensure your ingredients are impeccably fresh, never cook poultry below 65°C at the core, and consume immediately after cooking (no holding at room temperature). When in doubt, go to 63°C — that's the food safety threshold recommended by the FSA. A probe thermometer (£8-15) eliminates all guesswork.
Application recipe: low-temperature salmon
A fresh salmon fillet (not frozen — low-temp demands impeccable quality). Olive oil, salt, pepper. Place on an oven-safe dish. Oven at 90°C, 25 minutes. That's it. The salmon will be pearlescent, meltingly soft, almost translucent in the centre — that texture you pay £35 for in a restaurant, and which is actually the simplest thing in the world to replicate. Serve with a squeeze of lime, a scatter of flaky sea salt, and fresh dill.
The smart investment If low-temperature cooking appeals — and it will — the only truly useful purchase is a probe thermometer (£8-15). Not a £150 immersion circulator. Not a vacuum sealer. A probe thermometer that gives you real-time core temperature. It's the most underrated tool in home cooking, and professional chefs never work without one.
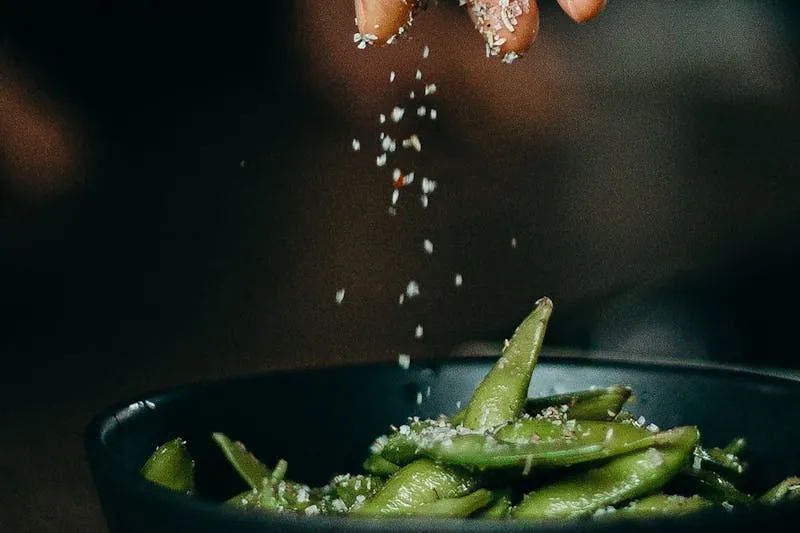
4. Layered seasoning: why your dish lacks "depth"
If I had to choose a single technique that separates everyday cooking from chef-level cooking, this would be it. Layered seasoning is the idea that you don't season your dish once, at the end, but at every stage of cooking.
A concrete example. You're making a stew. Typical home approach: you put everything in the pot, add salt at the end when you taste, and it always lacks "something." Chef approach: you salt your onions when you sweat them (the salt draws out water and accelerates caramelisation). You salt again slightly when you add your meat. You add acidity (wine, tomato) to balance. You adjust at the end. Each layer of seasoning penetrates the ingredients at a different stage, creating a depth of flavour impossible to achieve with a single seasoning.
The four dimensions of seasoning
Salt — not just "some salt." Salt amplifies existing flavours. It suppresses bitterness. It brings out sweetness. A dessert without salt is flat. An under-seasoned broth is lukewarm flavoured water. The exact amount? Chefs say "when you think it's enough, add a little more." It's frustrating advice but accurate: the tipping point between "good" and "incredible" is often half a pinch of salt.
Acid — the great forgotten dimension. A squeeze of lemon, a splash of vinegar, a spoonful of white wine. Acidity brings freshness, brightness, contrast. A rich dish without acid is cloying. Italian chefs finish almost everything with a squeeze of lemon. French chefs deglaze with vinegar. Asian chefs add fish sauce (salty AND acidic). Acid is the salt of the second dimension.
Fat — the flavour vehicle. Fat carries aromas. That's why a "light" dish often has less taste — not because it lacks salt, but because it lacks the vehicle to deliver flavours to your palate. A spoonful of butter at the end of cooking (the French chef's "monter au beurre") transforms any sauce.
Umami — the fifth taste. Parmesan, soy sauce, miso, tomato purée, anchovies, dried mushrooms. Umami delivers that sensation of "it's complete, it's satisfying" that you can't name but recognise immediately. A dash of soy sauce in a beef stew, a spoonful of miso in a vinaigrette, some grated Parmesan in pesto — it's the umami making the difference.
The chef test Next time you taste a dish and feel it "needs something," ask yourself: is it missing salt, acid, fat, or umami? The answer is almost always one of these four dimensions. Chefs don't cook by "feel" — they diagnose what's missing and correct it, dimension by dimension.
5. Deglazing: recovering the gold stuck to the pan

That brown stuff stuck to the bottom of your pan after searing meat? That's not "burnt bits." It's fond — the caramelised residue of the Maillard reaction, concentrated in flavour. And washing it down the drain is like pouring liquid gold down the plughole.
Deglazing is the technique that recovers this fond by adding liquid to the hot pan. The liquid dissolves the fond, and you instantly have a sauce with a depth of flavour your guests will describe as "restaurant quality." Because it's exactly what restaurants do.
Deglazing liquids
Red wine — for red meats, game, mushrooms. Let it reduce by half to cook off the alcohol and concentrate the flavours. Finish with a knob of butter.
White wine — for poultry, fish, shellfish. More subtle than red, it adds acidity without dominating.
Stock — for a richer, more robust sauce. Ideally homemade — but a good-quality stock pot does the job on a weeknight (chefs hate admitting it, but they all have a tub of concentrated stock hidden away somewhere).
Vinegar — an underused chef technique at home. Deglaze with balsamic after caramelising onions? A sublime warm dressing. Sherry vinegar after searing foie gras? The grande classique.
Cream — the "comfort" deglaze. Double cream in a pan of mushrooms, chicken, or lardons — it's the foundation of French bistro cooking, and it's utterly delicious.
Watch for the burn Good fond is golden to dark brown — not black. If the bottom of your pan is carbonised, don't deglaze: you'll get a bitter, unpleasant sauce. Black fond gets washed away. Only caramelised fond deserves recovering. The difference is visual and olfactory: good fond smells like caramel; bad fond smells burnt. Trust your nose.
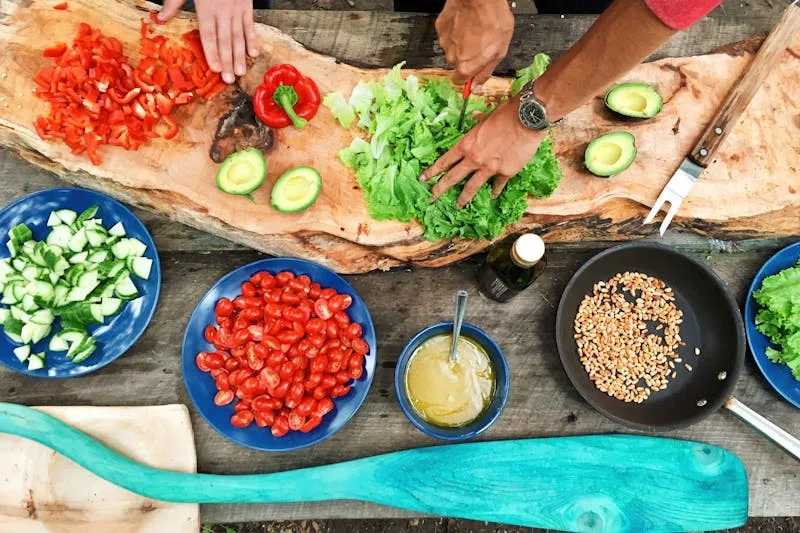
6. Precision cutting: why size matters (really)
You know why restaurant dishes look "better" than what you make at home — even with the same ingredients, the same recipe? Often, it's the cutting. Uniform pieces cook evenly. Irregular pieces give a result where some bits are raw and others burnt.
I'm not asking you to produce perfect 3mm brunoise (though it is satisfying once you get the hang of it). I'm talking about consistency. If you're cutting onions and some pieces are 5mm and others are 2cm, the small ones will be charred when the large ones are still raw. No cooking technique compensates for irregular cutting.
The three essential cuts
The dice (for onions and shallots). Cut the onion in half. Place the flat side on the board. Make horizontal cuts without slicing through the root end. Then vertical cuts. Then cut across. Result: regular dice, quickly, with minimum tears (because you're rupturing fewer cells than random chopping).
The chiffonade (for herbs and leaves). Stack your basil, mint, or sage leaves. Roll them into a tight cigar. Cut into thin slices perpendicular to the roll. You get delicate ribbons that won't blacken (because you're slicing cleanly instead of crushing).
The bias cut (for long vegetables). Carrots, courgettes, leeks — cut on the bias at 45°. More exposed surface = more Maillard = more flavour. And it's visually more elegant than a round disc.
The real game-changer Sharpen your knife. A blunt knife crushes fibres instead of slicing them, which accelerates oxidation (onions make you cry more, herbs blacken, fruit browns). Chefs sharpen their knives daily — a honing steel is sufficient (£12), no need for a £150 Japanese whetstone. A good knife badly sharpened is worse than a mediocre knife well sharpened.
7. Toasting spices: unlocking hidden aromas
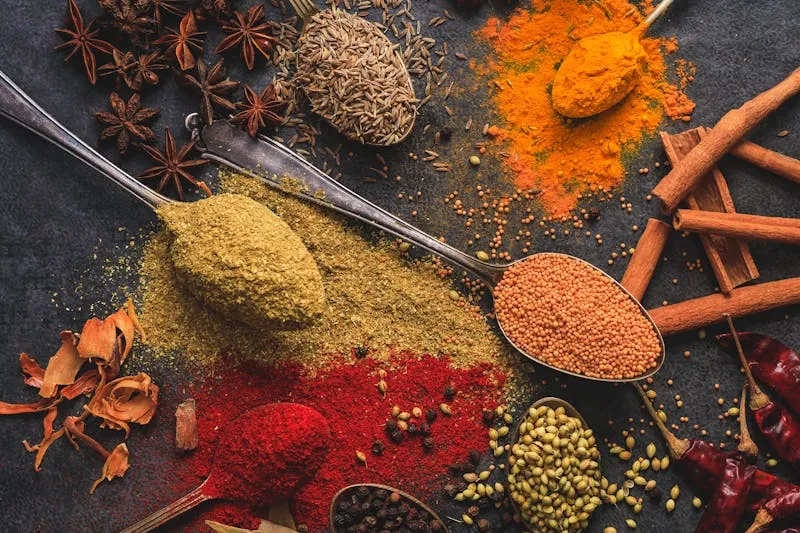
If you're using ground spices from a jar that's been open for six months, sit down — I have difficult news: your spices are dead. The volatile aromatic compounds — the entire point of the spice — have evaporated. What's left is scented sawdust.
Professional chefs work with whole spices that they toast and grind to order. And the difference isn't subtle — it's like comparing instant coffee and a freshly pulled espresso. A completely different world.
The technique
Dry pan (no fat), medium heat. Add your whole spices — cumin, coriander, cardamom, peppercorns, fennel, mustard seeds. Stir constantly. In 30 to 90 seconds, you'll smell the aromas explode — that's the heat releasing the essential oils trapped inside the spice. The moment it smells incredible, remove from heat immediately (spices burn quickly and turn bitter). Grind in a mortar or a dedicated coffee grinder.
Application recipe: homemade garam masala
Toast together: 2 tablespoons coriander seeds, 1 tablespoon cumin seeds, 8 green cardamom pods, 6 cloves, 1 cinnamon stick (broken), 1 teaspoon black peppercorns. Grind finely. This blend, stored in an airtight jar, is incomparably superior to any shop-bought garam masala — and keeps at full potency for 2-3 months.
8. Resting meat: the patience that changes everything
You take your roast out of the oven, you're starving, the house smells divine, and you want to carve NOW. I understand. But if you cut immediately, you'll witness a heartbreaking sight: all the juices flood out of the meat and pool on your board. Your meat will be dry. And all that lost juice should have been in the flesh, not on the wood.
Why? During cooking, heat causes proteins to contract and "squeeze" water towards the centre of the meat. During resting, these proteins relax and reabsorb some of that water. Result: rested meat loses 50% less juice when carved than meat cut immediately.
Resting times
Steak — 5 minutes minimum (half the cooking time). Cover loosely with foil, place on a wire rack (not in a plate, otherwise the underside goes soggy in its own juices).
Roast / whole bird — 15 to 20 minutes. Don't worry, it won't "go cold." Residual heat continues cooking for 3-5 minutes (that's "carry-over cooking"), then the meat stays warm for a good 20 minutes.
Leg of lamb / large joint — 30 minutes. Yes, 30. It's long. Set the table, make your gravy, have a glass of wine. The meat will be better than if you'd carved straight away.
The Bocuse trick Paul Bocuse said: "Resting meat is the cook's courtesy to the guest." He rested his poultry for 20 minutes systematically — and he flipped the bird halfway through resting so the juices redistributed evenly. Try it: turn your roast chicken over at the 10-minute rest mark. The breast meat will be visibly juicier.
9. Playing with textures: why great dishes feel "interesting"
When you eat at a starred restaurant and find the dish "interesting" — not just tasty, but interesting — it's almost always because it plays on multiple textures. Crunch against melt. Crispy against creamy. Gel against snap.
At home, we tend to serve mono-textured dishes: soft mash + soft meat + soft vegetables. It's fine flavour-wise, but the brain gets bored. Interest comes from contrast.
Winning contrasts
Crispy on soft. Croutons on a velvety soup. Fried onions on mash. Toasted flaked almonds on hummus. This contrast is the most powerful — the brain loves the surprise of crunch within softness.
Fresh on hot. Fresh herbs (never cooked!) on a hot dish. A drizzle of raw olive oil on steaming risotto. Fresh rocket on pizza straight from the oven. The contrast of temperature AND texture creates immediate sensory complexity.
Sharp on rich. Pickles on a burger. Cornichons with raclette. Lemon on butter-crusted fish. Acid "cuts" through fat, refreshes the palate, and rekindles appetite.
The rule I've adopted: every plate must contain at least two contrasting textures. It's simple to implement — a handful of toasted seeds, some fresh herbs, a drizzle of finishing oil — and it transforms a "decent" dish into a "wow" dish.
10. Plating: eating with the eyes first
Plating is the technique that impresses your guests the most — and paradoxically, it's the simplest to learn. Because it requires no additional culinary skill. Just a shift in perspective.
Five rules for home plating
Rule 1: the plate is a canvas, not a container. Leave empty space. Space lets the dish breathe. A chef rarely uses more than 60% of the plate's surface. The rest is white space that frames and elevates.
Rule 2: height. Stack. Even slightly. A steak lying flat with chips spread around it is a canteen. The same steak sitting on a bed of mash, with chips stacked vertically alongside, is a Parisian bistro. The third dimension transforms everything.
Rule 3: odd numbers. Three prawns, not four. Five quenelles, not six. The brain finds odd numbers more "natural" and more elegant. It's a visual composition rule that chefs apply instinctively.
Rule 4: colour. A monochromatic plate is dreary. Add a colour contrast — green herbs on a beige dish, pink radishes on a green salad, golden sauce on white fish. A single colour accent is enough.
Rule 5: clean the rim. Wipe the rim of the plate with a damp cloth before serving. It's the fastest and most effective gesture for going from "homemade" to "made with care." Chefs do it for every single plate. Every. Single. One.
The ultimate trick Invest in good white plates. Round, simple, undecorated. Not patterned. Not coloured. White. Like 90% of Michelin-starred restaurants. White showcases food colours and gives a cleaner, more professional look to any dish. It's an investment of £25-40 that visually transforms every dinner you serve.
These ten techniques aren't magic. They're physical, chemical, and visual principles that top chefs apply by reflex and that you can apply through understanding. The difference between a "decent" dish and one that makes people close their eyes with pleasure often comes down to two or three of these techniques — no more.
Start with whichever speaks to you most. Master it. Then move to the next. No need to do everything at once — chefs themselves learnt these skills one at a time, over years.
And the next time you taste something in a starred restaurant and think "that's magic"… you'll know the magic has a name, a temperature, a duration, and an explanation. And that is the best thing that can happen in a kitchen: understanding WHY it's good.
Frequently asked questions about chef techniques
Do I need professional equipment to replicate these techniques?
No, and that's the central message of this article. The only truly useful investments are: a good chef's knife (£25-60), a probe thermometer (£8-15), and a stainless steel or cast iron pan (£25-50). With these three tools and a standard oven, you can replicate 95% of the techniques presented here. The rest is understanding and practice.
How long does it take to master the Maillard reaction?
The theory takes 5 minutes to understand. The practice requires about ten attempts to calibrate temperature and timing with your specific equipment (every pan and every hob heats differently). After roughly a month of regular practice, the technique becomes automatic — you'll hear from the sound whether the temperature is right, and see from the colour when to flip.
Is low-temperature cooking dangerous?
No, provided you follow basic hygiene rules: fresh ingredients, minimum temperatures respected (65°C for poultry, 54°C minimum for red meats), immediate consumption. Low-temperature cooking is used in Michelin-starred restaurants worldwide — the food safety risk is perfectly managed when protocols are followed. When in doubt, a probe thermometer (£8) eliminates all uncertainty.
How do I rescue a split emulsion?
In a clean bowl, add a tablespoon of ice-cold water or mustard. Gradually incorporate the failed preparation into it, whisking vigorously. The cold water and renewed agitation will re-disperse the fat droplets. This method works for mayonnaise, vinaigrettes, and beurre blanc 9 times out of 10.
Why do shop-bought ground spices have less flavour?
The aromatic compounds in spices are volatile molecules — they evaporate on contact with air. A ground spice has a vastly greater surface area exposed to air than a whole spice, so it loses its aromas much faster. A ground spice that's been open for 3 months has lost 40-60% of its aromatic potency. Whole spices, stored in airtight containers, keep their aromas for 1-2 years.
Which technique has the biggest impact for a beginner?
Layered seasoning, without hesitation. It's the technique that produces the most dramatic result with the least technical change. You need no additional equipment — just the awareness to salt, acidify, and add fat at every stage instead of once at the end. The difference is noticeable from the very first attempt.
How long should I rest a roast chicken?
A standard roast chicken (1.5-2kg) should rest for 15-20 minutes after leaving the oven, loosely covered with foil on a wire rack (not in the roasting tin). During this time, the internal temperature will rise 3-5°C (carry-over cooking), then the muscle fibres will relax and reabsorb the juices. A chicken carved immediately loses up to 40% of its juices — a rested chicken loses less than 15%.